Cuban Yuca Two Ways: Yuca With Mojo and Yuca Fries
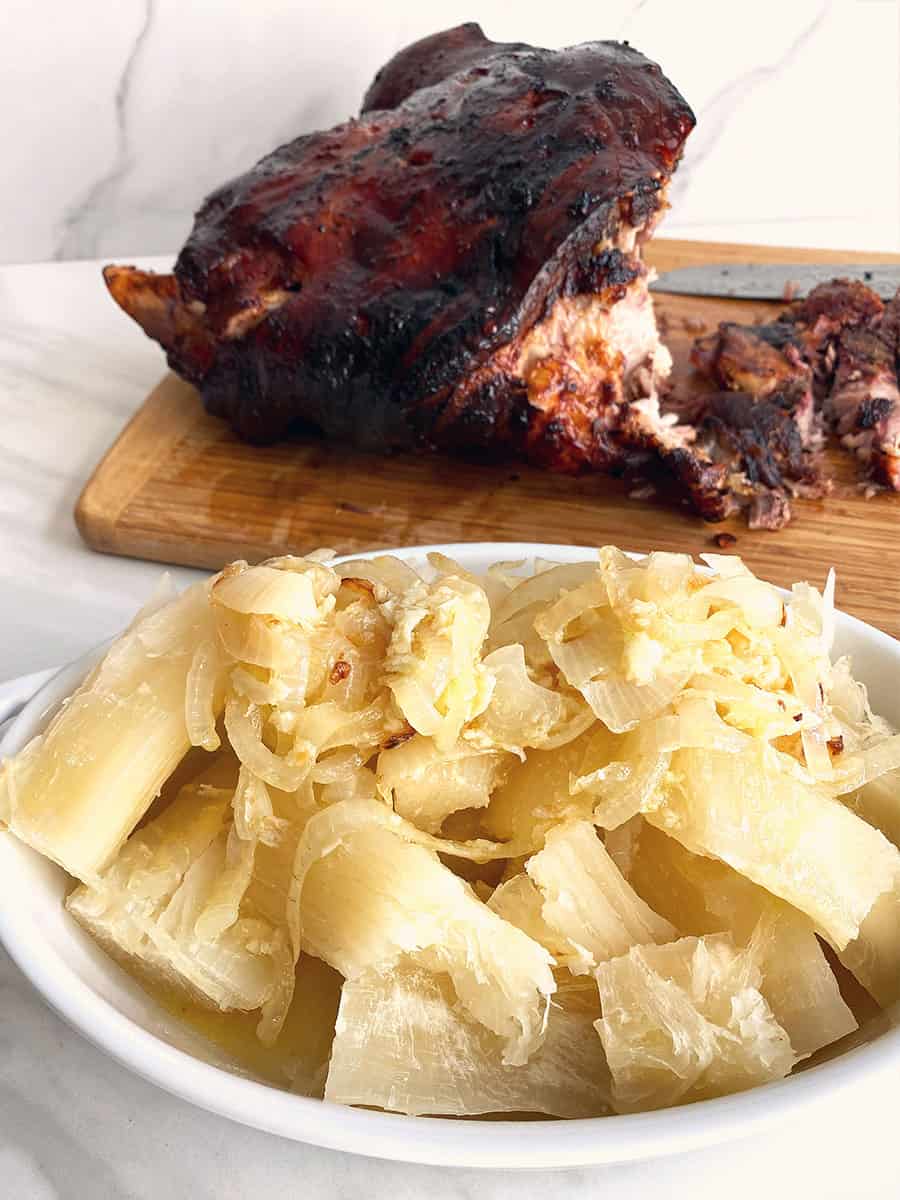
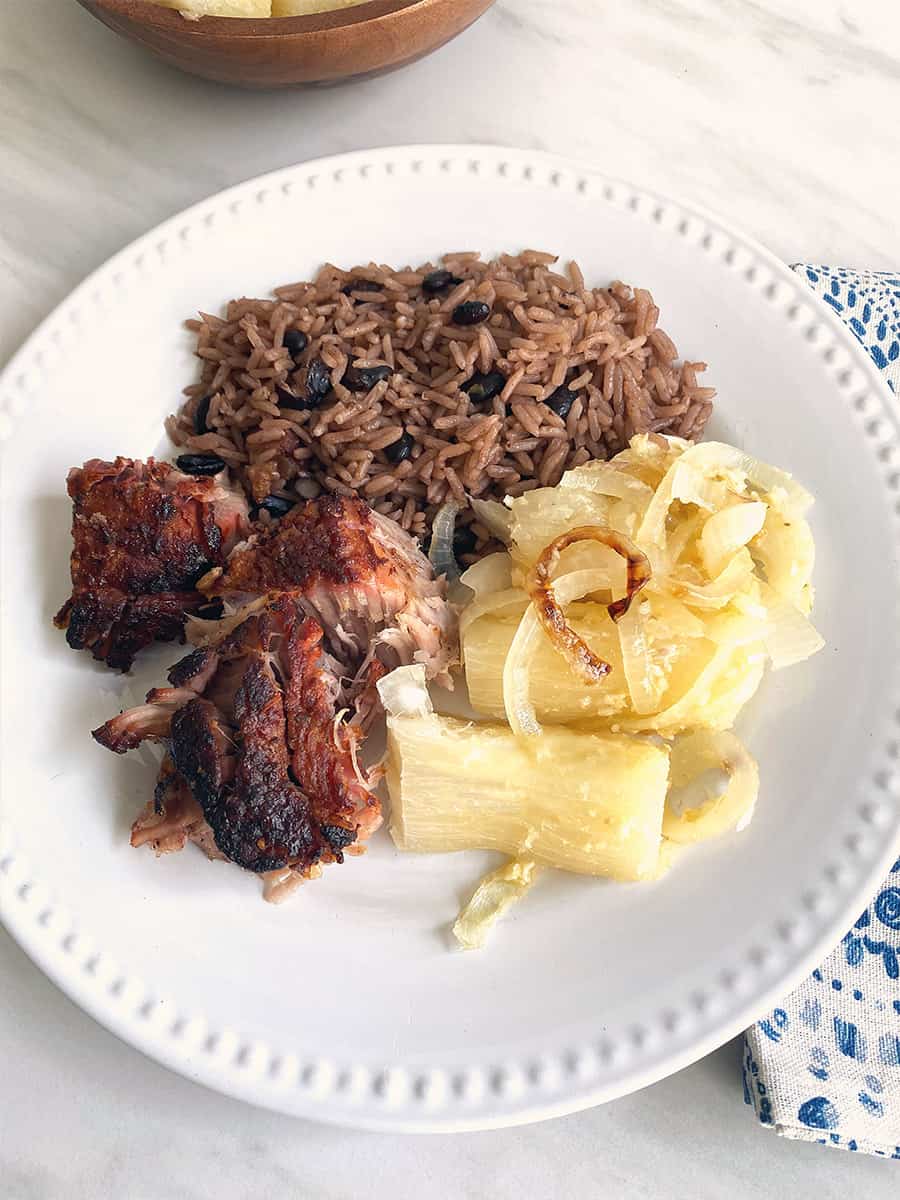
Yuca with mojo or yuca fries are great side dishes to serve with Cuban roast pork. In fact, yuca is preferred over the usual fried plantains. As much as we love our fried maduros and tostones, yuca and roast pork are a Cuban power couple. The traditional Cuban dish we serve for the holidays consists of Cuban roast pork, yuca con mojo, and congri rice. And, of course, we have to make enough for pork sandwiches and yuca fries the next day!
What is Yuca
Good question! Yuca is a root vegetable that is denser and starchier than potatoes and is served boiled and smothered with mojo and onions. It has a very mild taste that absorbs all the garlicky goodness of the mojo, and the texture is creamy but firm. It’s quite a surprise when you first eat it!
Although the texture and taste are good, what makes this dish so praiseworthy is the mojo, which consists of sour oranges, garlic, olive oil, salt and pepper, and sauteed onions. When I say the yuca is smothered, I do mean smothered! In fact, I always serve a side of mojo so you can have extra!
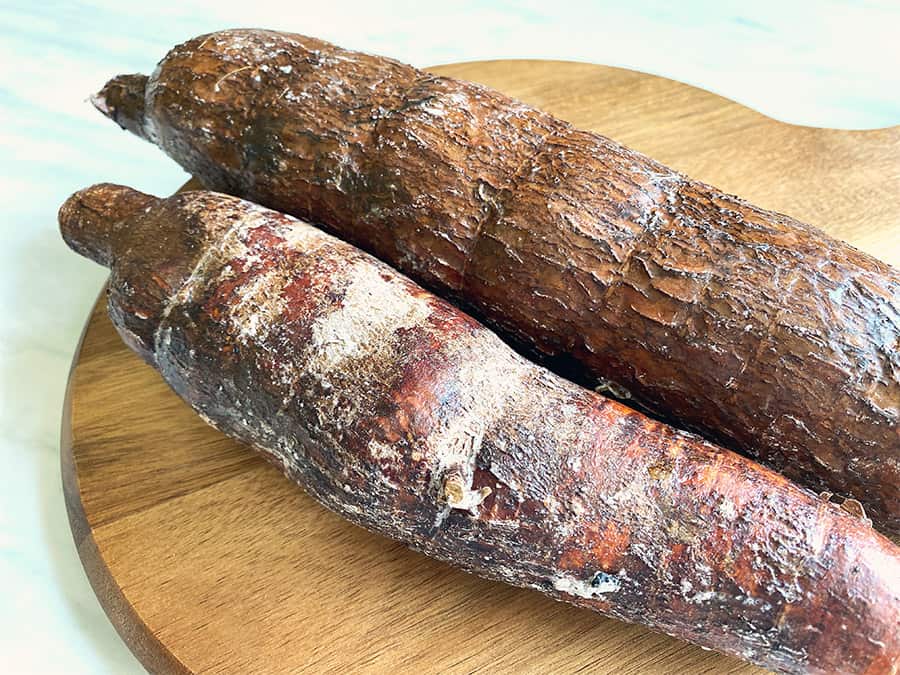
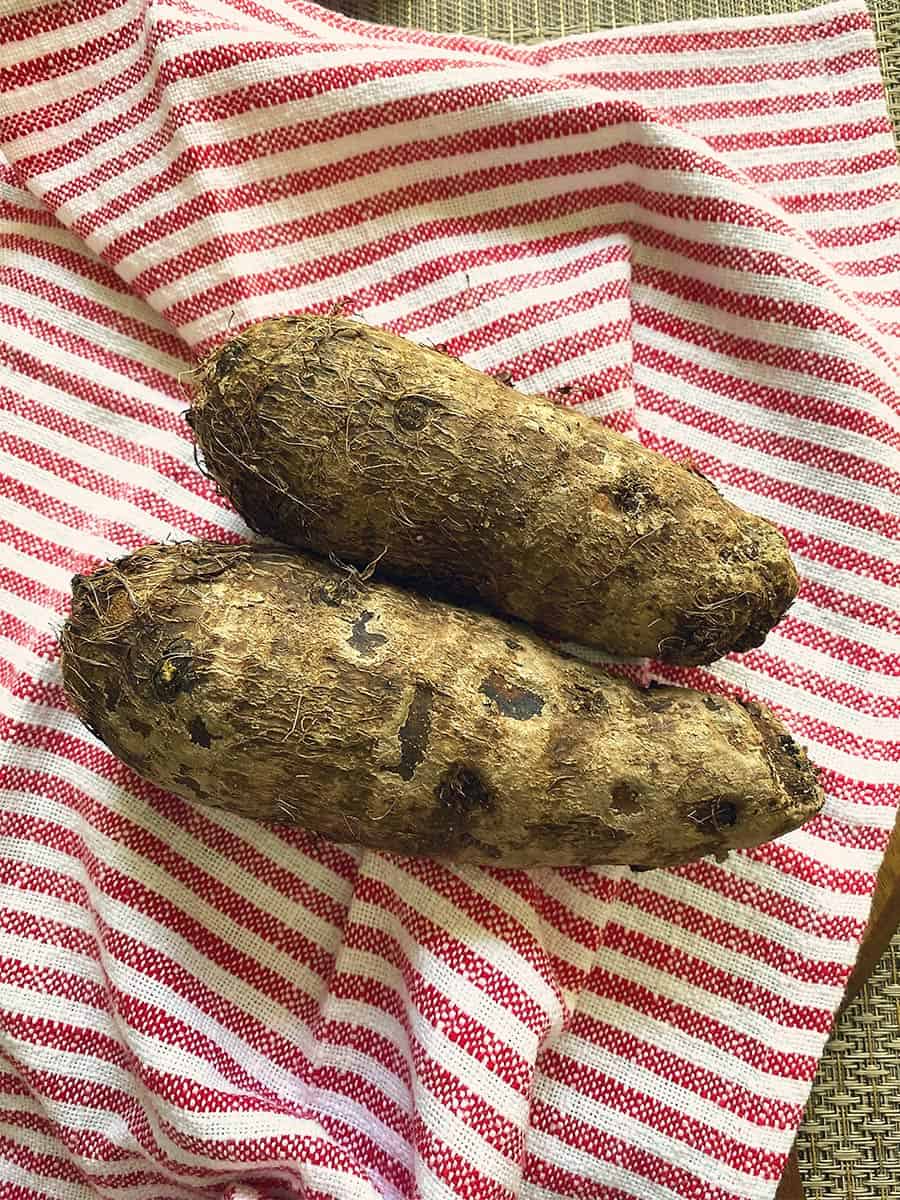
Yuca is a very long vegetable, and it has a thick bark-like skin. So you need to make sure you remove the top layer that’s dark brown and the second layer that’s light pink. In fact, the best way to peel the yuca is to cut a slit lengthwise and then start to peel off the skin, similar to how you would a bark.

It’s easier to remove the bark if you first cut the yuca into four-inch pieces lengthwise. Once the bark is removed, split each yuca piece in half or thirds. You’ll notice there’s a tough string-like piece in the center. You’ll want to remove that because it’s too tough to eat. The easiest way to remove it is after you boil the yuca. So boil the yuca until tender and remove the thick string-like center.
If you can’t find fresh yuca in the produce section, you may be able to find frozen yuca chunks ready to cook.
How To Make Mojo Sauce
This is a versatile sauce that’s also used as a marinade. When you use it as a marinade you omit the onions and add a little cumin and oregano. Mojo is easy to make, and it packs such a nice citrusy punch!
To make the mojo sauce for the yuca, sauté sliced onions and crushed garlic in olive oil until the onions are softened. Then add fresh-squeezed sour orange juice at the end. If you can’t find sour oranges, you can use a combination of equal parts fresh-squeezed lime juice and orange juice. Add some salt and pepper and that’s it! You can play it pretty fast and loose with the ingredients and add as much or as little as you like to get it where you like it. You’ll find you’ll be using this sauce to top meat dishes and veggies all the time!

Make Yuca Fries With The Leftovers!
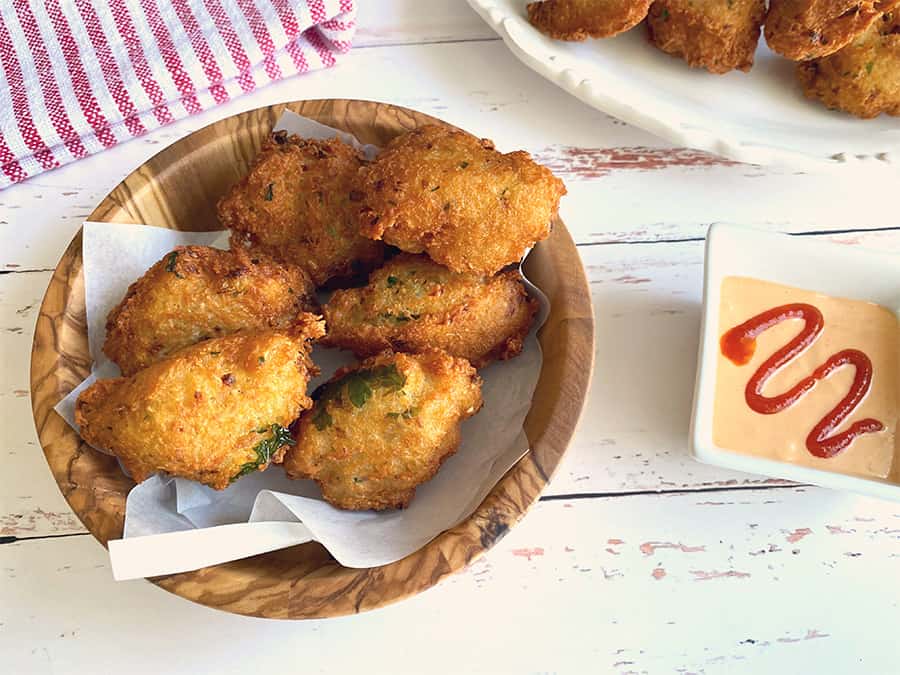
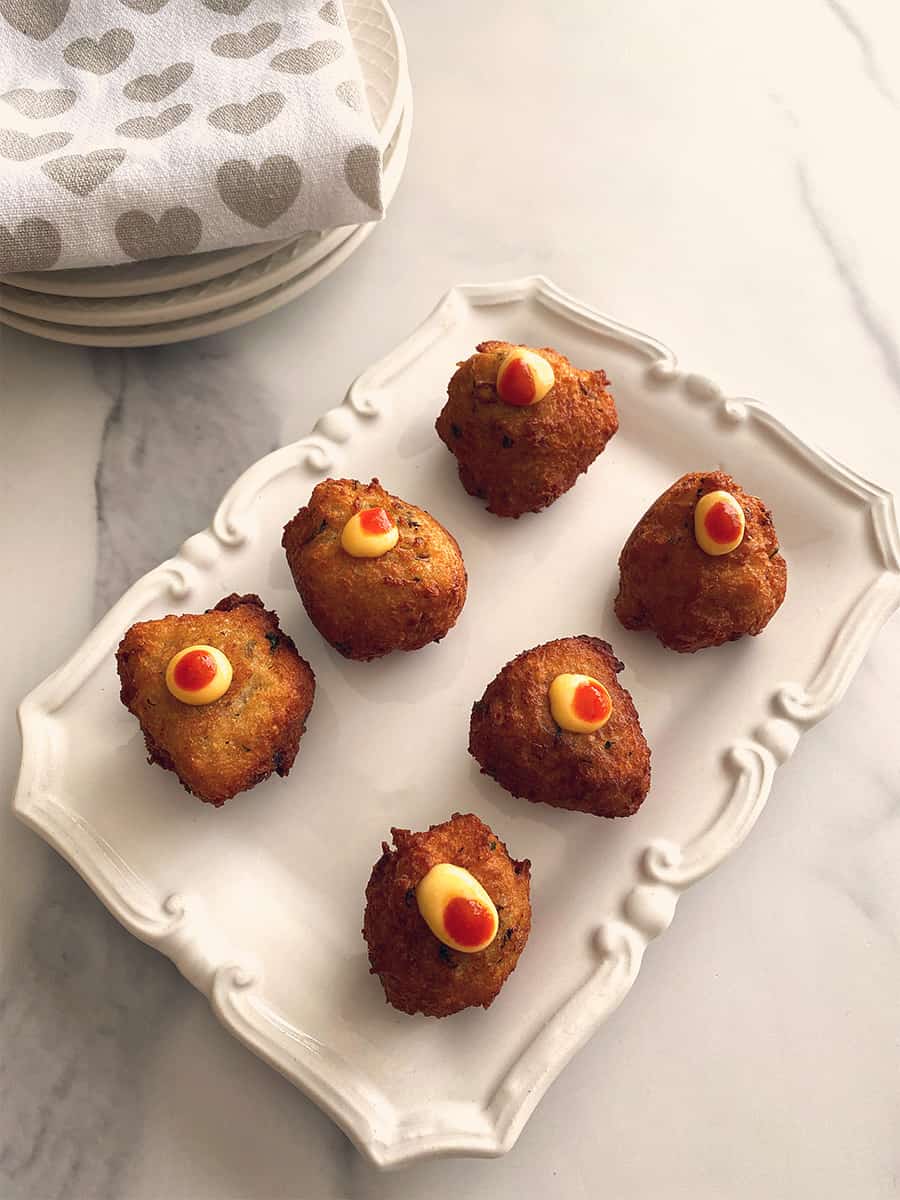
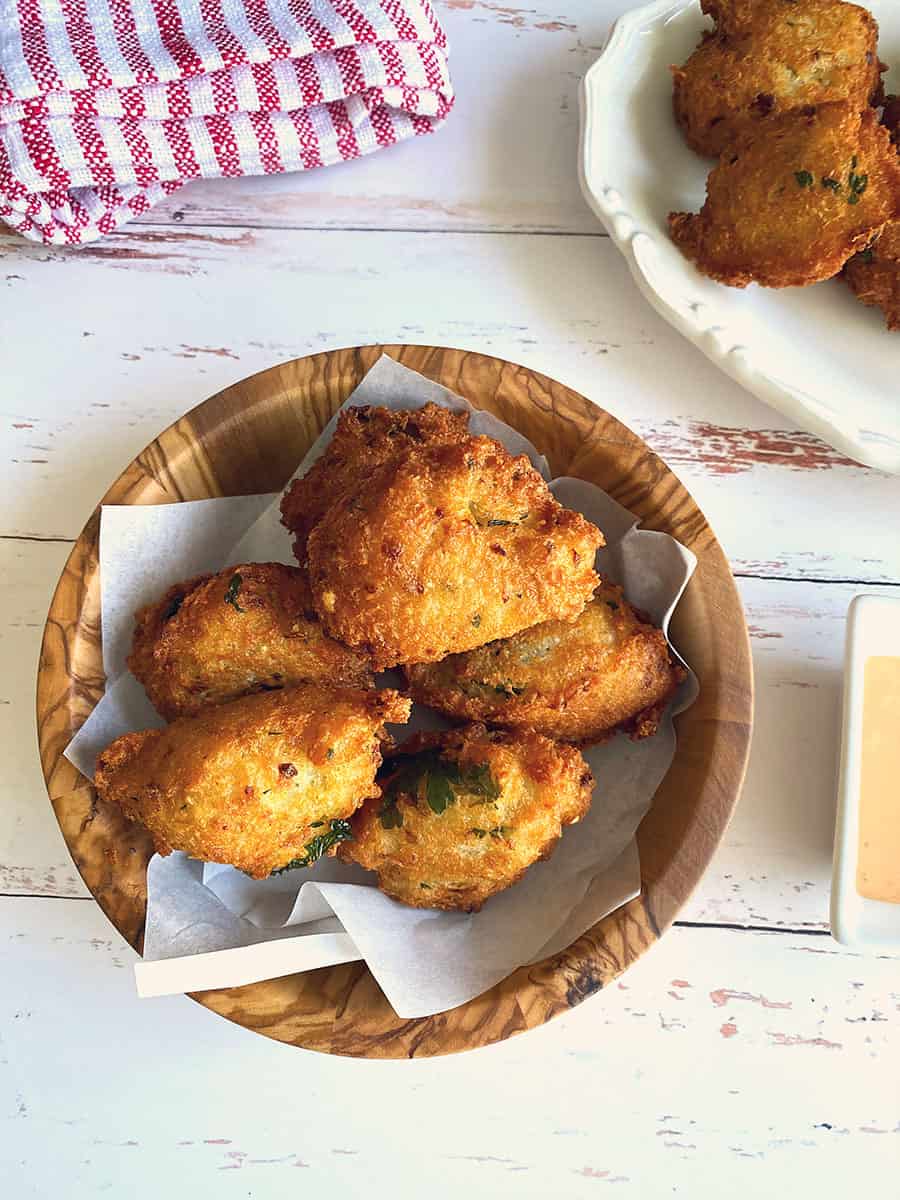
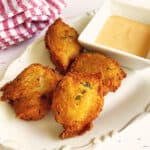
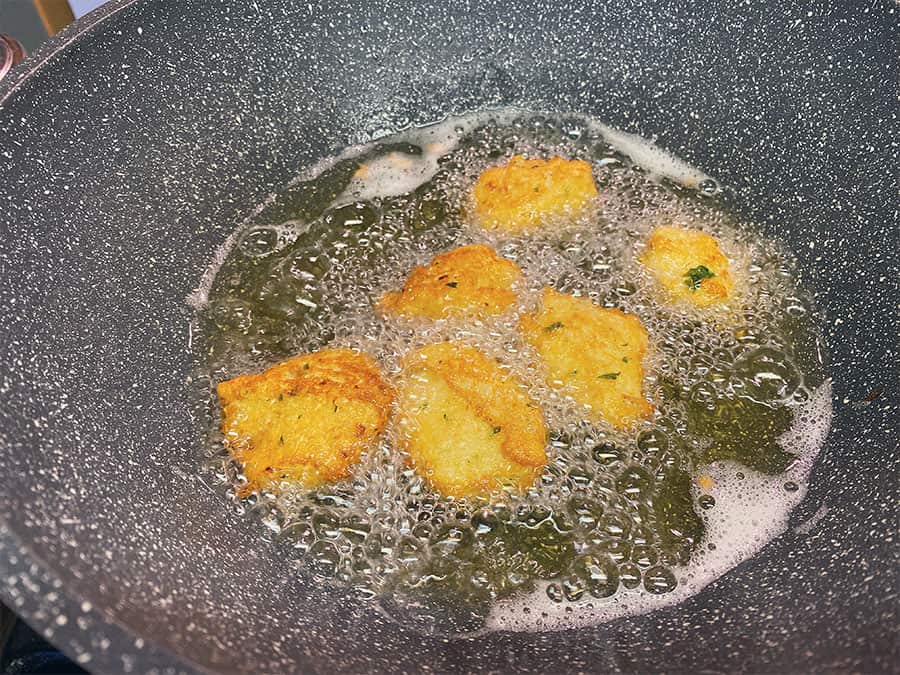
You always want to make a little extra yuca and mojo for the second day because you’ve got to make yuca fries. To make the yuca fries, slice the yuca pieces into planks that look somewhat similar to wedge fries but so much better, IMHO. When you fry the yuca, the outer skin gets super crunchy, and the inside gets creamy. This is the best way to enjoy your leftover yuca! If you want just go for the yuca fries, you’ll still need to boil the yuca and let it cool before you make the yuca fries.
Serve the yuca planks with mojo on top or on the side. Or, my favorite, serve it with a little lime-cilantro aioli. OMG! I want some right now🤤
A local fast food place in Miami called Pollo Tropical serves Yucatan fries (fried yuca), and they are the best. They also cut the yuca into tiny chunks to make the Cuban version of tater tots. So, yes, you can also cut the yuca into 1-inch pieces and make them tater tot style. If you live in Florida, you’re probably familiar with this chain. If not, stop by when you visit the state!
Want to try the yuca with the Cuban roast pork? Here’s the recipe for lechon asado. And, if you want to go for the full Cuban feast, make caramel flan for dessert, too.
Print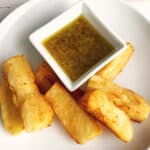
Cuban Yuca Two Ways: Yuca With Mojo and Yuca Fries
- Prep Time: 5
- Cook Time: 20
- Total Time: 25 minutes
- Yield: 10 1x
- Category: vegetable
- Method: boil or fry
- Cuisine: Cuban
Description
Yuca with mojo sauce is a great side dish for roast pork. This Cuban root vegetable is dense, creamy and is often eaten as yuca fries, too.
Ingredients
2–3 big yuca root vegetable (about 2 pounds)
1 sliced yellow onion
5–6 cloves minced garlic
¼ cup olive oil
Juice from 1–2 sour oranges, or to taste (see note)
Salt and black pepper to taste
Instructions
Boiled Yuca With Mojo
- Heat a pot of salted water and bring to a boil.
- While the water heats up, slice the onions and mince the garlic.
- Cut the yuca into 4 inch pieces and then half each piece.
- Peel the yuca skin (you need to remove both the dark outer skin and the pink layer underneath… see note).
- Add the yuca to the boiling water and lower the heat to a simmer. Cook the yuca until fork tender (about 20 minutes or so).
- Heat the olive oil in a skillet over medium heat and cook the onions and garlic until the onions are softened but not browned.
- Add the sour orange juice to taste.
- Add salt and pepper to taste.
- Pour over boiled yuca.
Yuca Fries
- Cut the leftover boiled yuca pieces into wedges. (It’s best to cut while it’s cold.)
- Heat 1-2 cups of vegetable oil in saucepan.
- Fry the yuca wedges.
- Remove from the heat and drain on paper towels.
- Serve with leftover mojo sauce (or make some more, if you ate all if to the day before!). You can also serve the yuca with lime cilantro aioli.
Notes
You should be able to find sour oranges in Latin markets. But if it’s not available, use a mixture that’s equal parts lime juice and orange juice. You’ll want roughly ¼ cup of juice.
If you can’t find the yuca in the produce section, you’ll probably find it in the freezer section.
The best way to peel the yuca is to cut the long yuca into 4 inch pieces. Then cut a slit into the thick bark-like skin. Peel back the bark as you would on a tree. This way, you’ll remove both the outer skin that’s dark brown as well as the inner layer that’s light pink. The pink layer is hard and is not appetizing.
This recipe makes enough for about 6 servings of yuca and leftovers for about 3-4 servings the next day.
Nutrition
- Serving Size: 10
Cuban Yuca Two Ways: Yuca With Mojo and Yuca Fries Read More »