Recipes

brunch toast

Breakfast Toast is the Best Way To Start Your Day!

These easy-to-make breakfast toasts are perfect for a quick weekday breakfast or a lazy Saturday morning brunch! If you’re still messing around with butter and jam, it’s time you kicked it up a notch and tried one of these fun breakfast toasts.

What I love about breakfast toast is that it’s so versatile. You can mix and match spreads and toppings based on what you have on hand. If you’re feeding a crowd, you can serve these up buffet style and let folks make their own versions.

brunch toast

Building The Perfect Breakfast Toast

You need three good layers for your breakfast toast and then a few finishing touches to turn your morning breakfast into a foodie feast. 

Your Canvas: You need a good slice of sourdough, it’s hearty enough to stand up to all the fixins’ and the flavor is mild enough to go with just about anything. Other good choices here would be a hearty Italian loaf or ciabatta. Brioche or challah bread are too soft to do the job right.

Your Base: What are you in the mood for, sweet or savory? The base will determine the direction you go with your toppings. The spreads I love to use are goat cheese, avocado mash or almond butter. Goat cheese and avocado are very versatile, and almond butter is so good with fruit!

Toppings: Once you’ve got your base figured out, we’re ready to build! Goat cheese is perfect with berries or smoked salmon. And, avocado mash is delicious with goat cheese, smoked salmon or a fried egg. Almond toast is great with sliced bananas or berries.

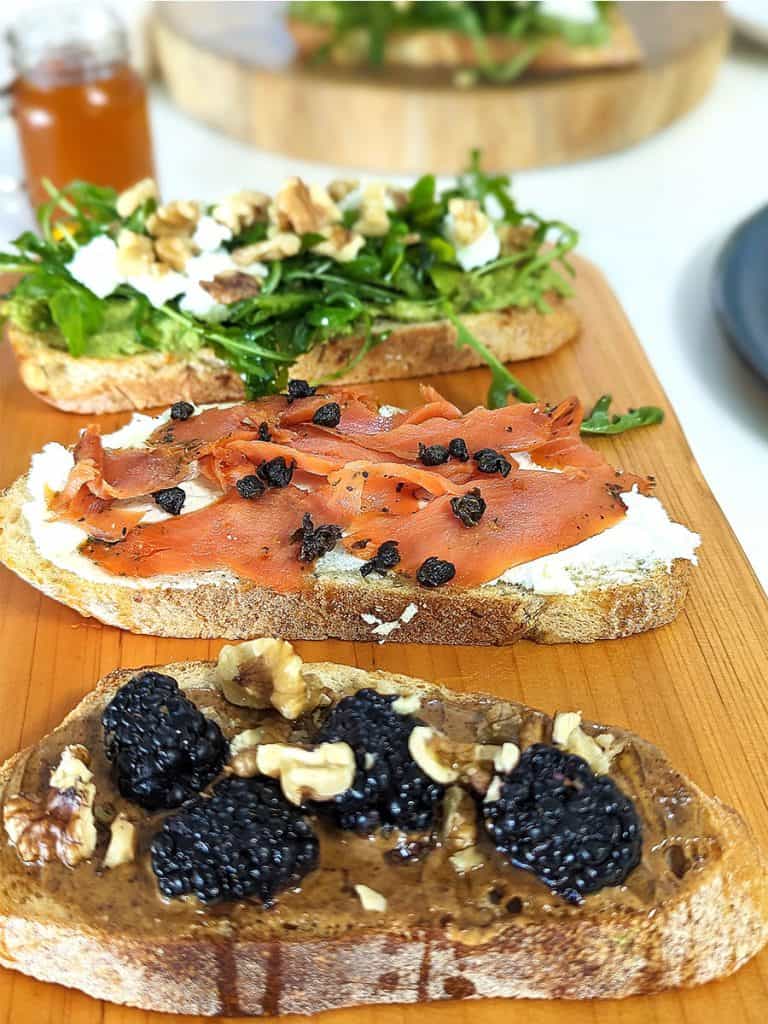
Three Toast Combos to Try

best avocado toast

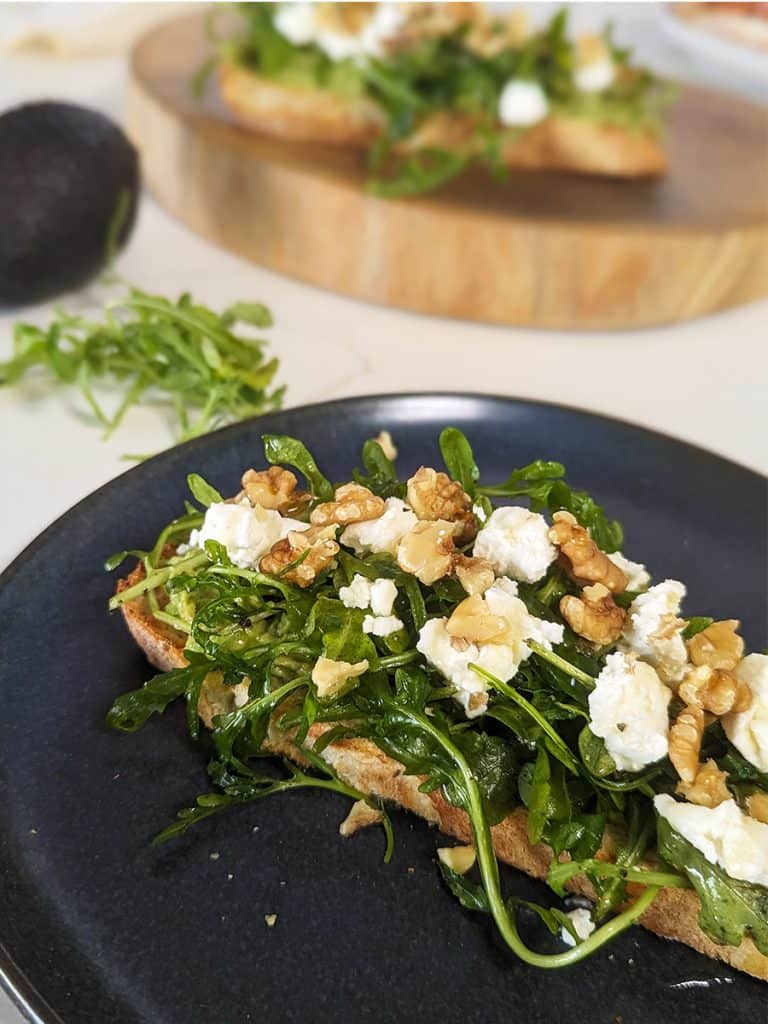
Avocado, Goat Cheese and Arugula

I first tried this combo at a local spot in Midtown Miami called La Toast Avocado Bar. It was so good I had to try it at home! It’s so easy and the flavors work so well together.  You start with the avocado mash and then top with the arugula, crumbled goat cheese, walnuts and, what really makes this shine, a drizzle of honey. This last ingredient was unexpected when I first tried this toast. I would not have thought to pair honey with avocados, but it was so good that now I add honey to all my breakfast toasts. You need a little golden sweetness in your life, especially in the morning!

salmon toast

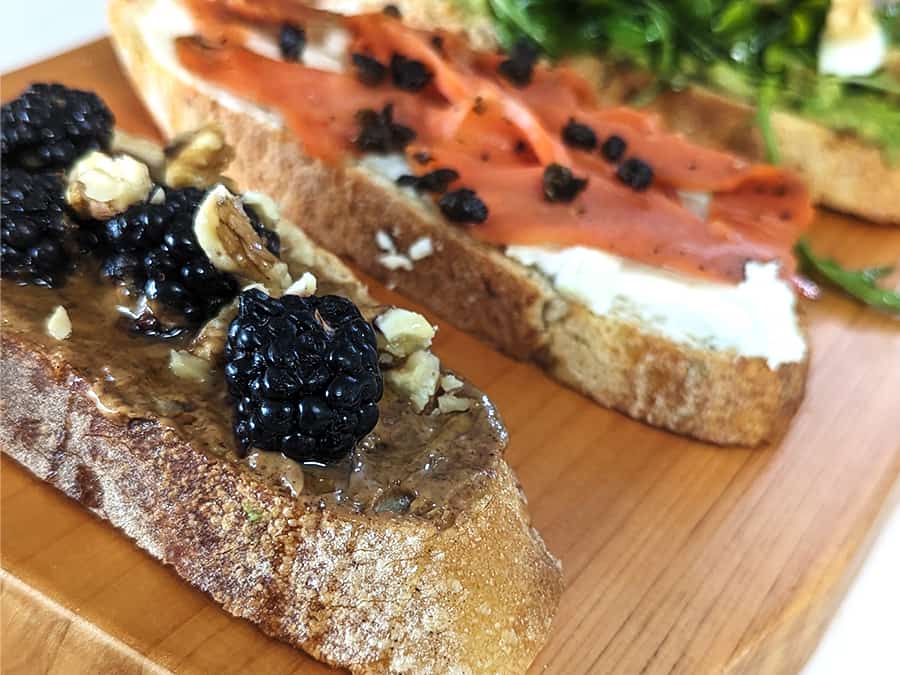
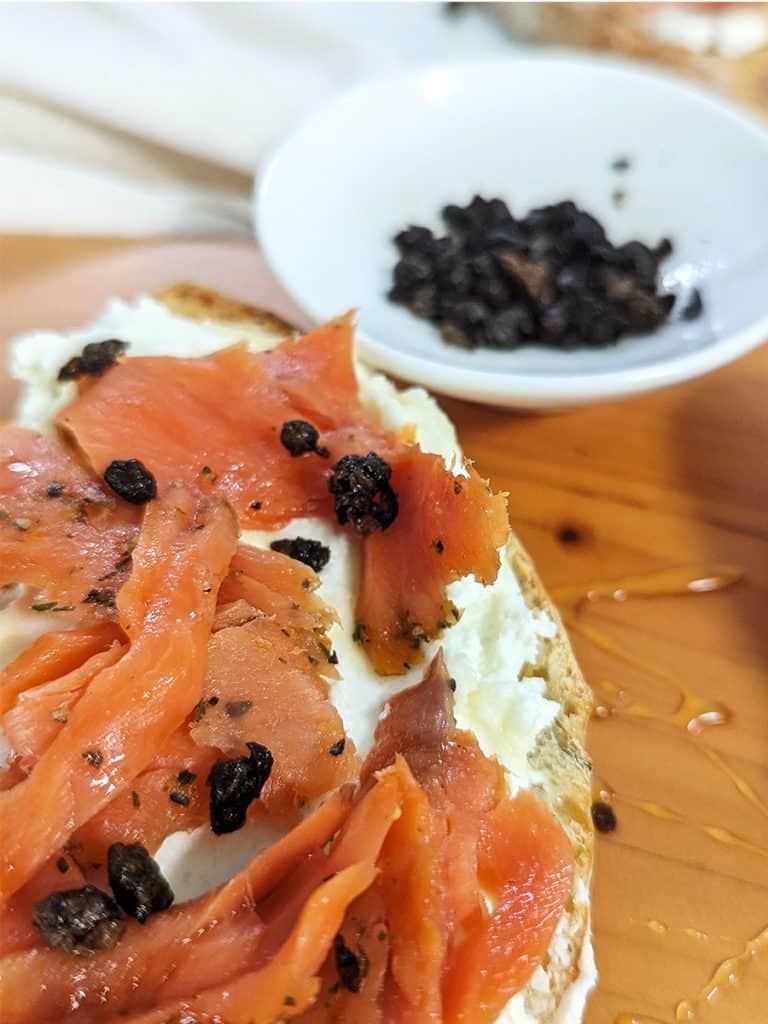
Goat Cheese, Smoked Salmon and Fried Capers

This little toast is actually a tapas dish at Bulla Gastrobar, a local tapas restaurant in Miami. Their version had a thick layer of goat cheese on a French baguette, topped with smoked salmon, fried capers and honey. Fried capers sounds like a lot to do in the morning, but it’s super easy and quick to make, you can do it even before you’ve had your first cup of coffee. 

breakfast toast

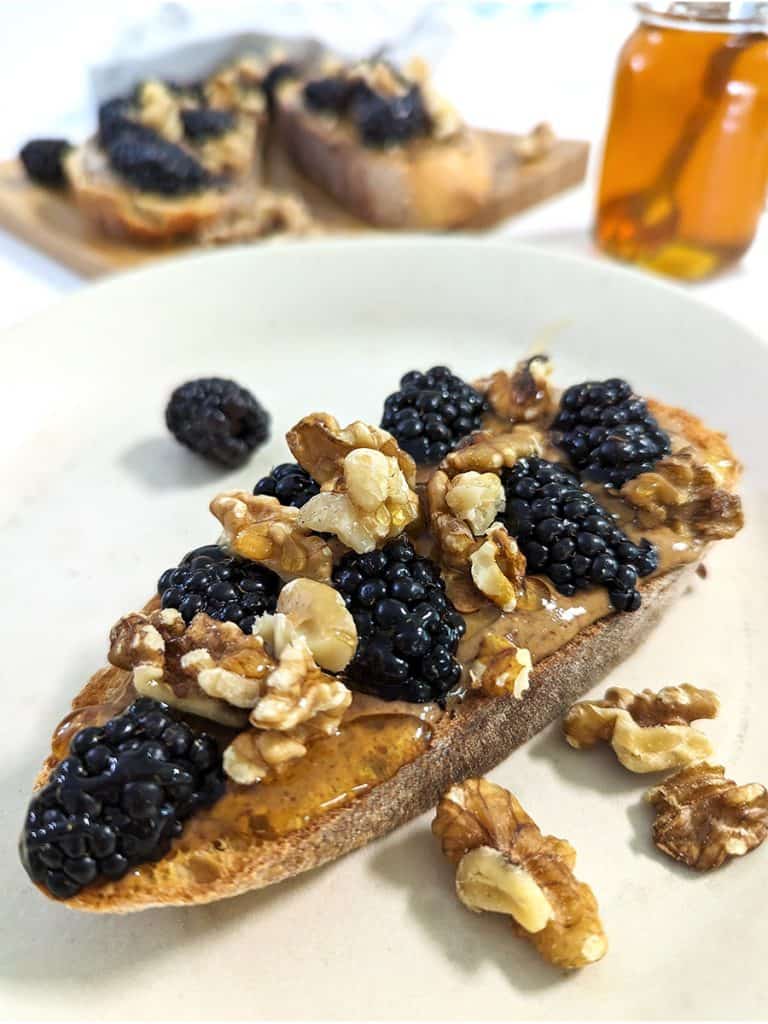
Almond Butter Toast with Berries

This is the simplest one to make and the one I have most often. Just top your thick slice of sourdough with a generous spread of almond butter and then add fresh berries, almonds and honey. Nothing can go wrong the rest of the day after this toast! Go to recipe –>

Breakfast is the most important meal of the day, so don’t skip it. Treat yourself to a thick slice with your favorite toppings and a good, strong coffee. Sit down and savor the moment before your day gets started… it will make your day!

Print
clock clock iconcutlery cutlery iconflag flag iconfolder folder iconinstagram instagram iconpinterest pinterest iconfacebook facebook iconprint print iconsquares squares iconheart heart iconheart solid heart solid icon
Avocado Toast

Avocado, Goat Cheese and Arugula

  • Author: Sandi Abbott
  • Prep Time: 15
  • Cook Time: 5
  • Total Time: 20 minutes
  • Yield: 4 1x
  • Category: breakfast
  • Method: toasting

Description

This avocado toast is a complete meal!  Topped with arugula, goat cheese, walnuts and honey, it’s got lots of protein, healthy fats, and just a drizzle of sweetness to make your morning perfect!


Ingredients

Scale

4 slices of sourdough or hearty Italian bread, about 1⁄2 inch thick

2 Haas avocados, peeled and mashed

1⁄4 cup walnuts

2 tablespoons honey

2 cups arugula

2 ounces goat cheese, room temperature

2 teaspoons olive oil

1⁄2 teaspoon salt

1⁄2 teaspoon black pepper (a few twists of a pepper mill)


Instructions

Prep

Peel the avocado and chop into pieces, add 1⁄4 salt, 1⁄4 teaspoon black pepper, and mash with a fork.

Toss the arugula with the olive oil and the remaining salt and black pepper. 

Chop the walnuts.

Toast the bread.

Assembly

Spread a quarter of the avocado mash, top with a quarter of the arugula, sprinkle 1 tablespoon of the walnuts and drizzle with honey. 


Notes

I like to use sourdough, but other good breads to use would be ciabatta, hearty Itallian, French baguette, multi-grain. 

Keywords: best avocado toast, avocado toast ideas, toast for breakfast, brunch toast, breakfast toast

Print
clock clock iconcutlery cutlery iconflag flag iconfolder folder iconinstagram instagram iconpinterest pinterest iconfacebook facebook iconprint print iconsquares squares iconheart heart iconheart solid heart solid icon
smoked salmon toast

Goat Cheese, Smoked Salmon and Fried Capers

  • Author: Sandi Abbott
  • Prep Time: 10
  • Cook Time: 10
  • Total Time: 20 minutes
  • Category: breakfast
  • Method: toast, fry

Description

This toast is super easy to make and so deliciously different. The goat cheese is a great complement to the smoked salmon and the fried capers and honey add contrast and depth. It’s a nice twist to the traditional bagel and lox version and it’s quick and easy for a lazy Sunday morning. 


Ingredients

Scale

4 slices of sourdough or hearty Italian bread, about 1⁄2 inch thick

4 ounces goat cheese, room temperature

4 ounces smoked salmon

2 tablespoons honey

2 tablespoon capers, drained

2 tablespoon olive oil


Instructions

Prep

Heat the olive oil, toss in the capers and fry for about a minute (maybe less). Stir the goat cheese to a spreadable consistency. If you were not able to bring the goat cheese to room temperature, microwave for 30 seconds to soften it first. 

Toast the bread.

Assembly

Spread each slice with one ounce of goat cheese, one ounce of smoked salmon, 1⁄2 tablespoon of capers, drizzle with honey.


Keywords: breakfast toast, brunch toast, smoked salmon toast, breakfast toast recipes, toast for breakfast

Print
clock clock iconcutlery cutlery iconflag flag iconfolder folder iconinstagram instagram iconpinterest pinterest iconfacebook facebook iconprint print iconsquares squares iconheart heart iconheart solid heart solid icon
almond butter toast

Almond Butter Toast with Berries

  • Author: Sandi Abbott
  • Prep Time: 5
  • Cook Time: 5
  • Total Time: 10 minutes
  • Yield: 4 1x
  • Category: breakfast
  • Method: toast

Description

This almond butter brunch toast nutritious and delicious, and takes just a few minutes to make! We used blackberries in our version, but you can use different berries or even swap the berries for a banana. Try it for a delicious start to your day!


Ingredients

Scale

4 slices of sourdough or hearty Italian bread, about 1⁄2 inch thick

8 tablespoons almond butter

2 tablespoons honey

1⁄4 cup walnuts, chopped

1 cup blackberries


Instructions

Toast the bread. Spread 2 tablespoons of almond butter on each slice, sprinkle with 1⁄4 cup blackberries, one tablespoon of chopped walnuts, drizzle with honey.


Keywords: toast for breakfast, breakfast toasts, almond toast, brunch toast, breakfast toast, breakfast toast recipes, almond butter toast

steak skewers

Steak Skewers With Peruvian-Style Marinade… So Good!

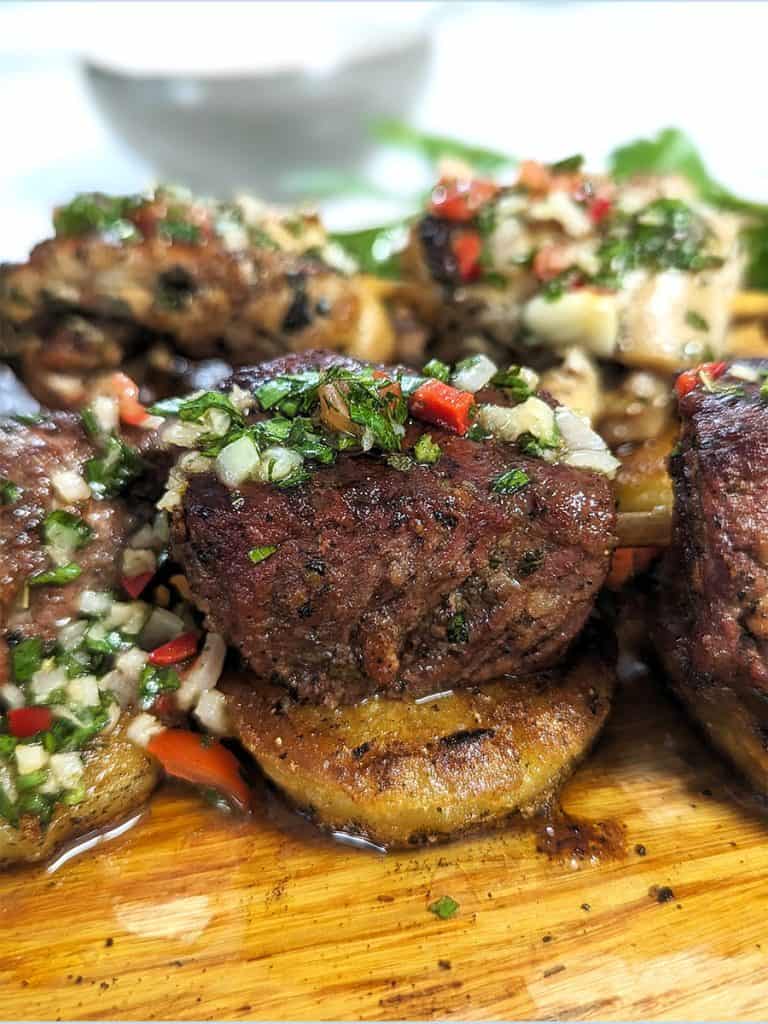
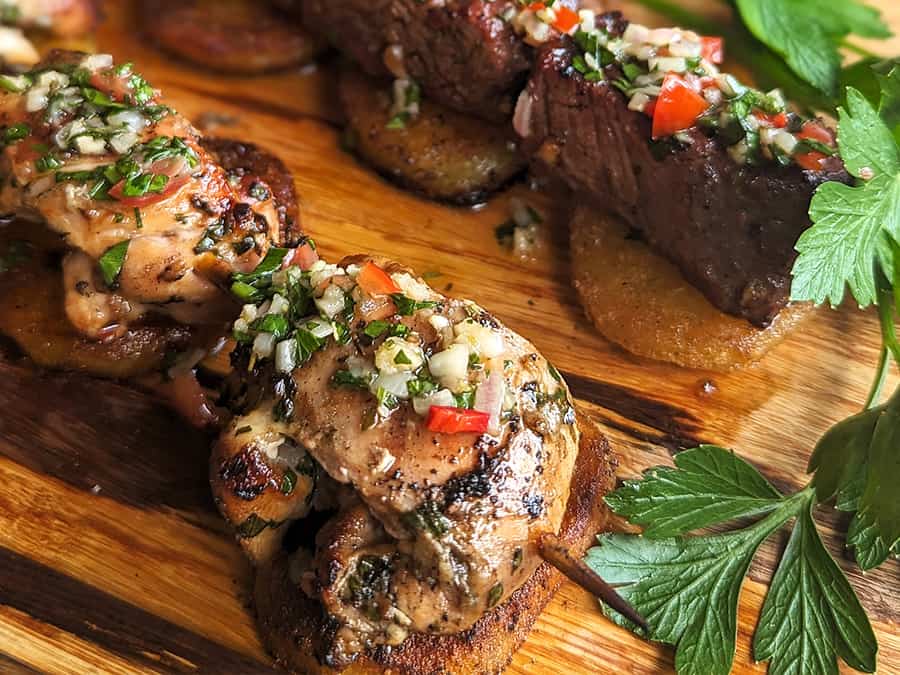
You’ve got to try these Peruvian-style steak skewers for your next barbecue! Tender sirloin tidbits, lightly charred and bursting with flavor, smothered with a zesty pepper sauce and placed on a bed of fried potato slices… it’s just a party waiting to happen! 

Skewers, known as pinchos in Latin cooking, are fun party food and the stuff of epic summer barbecues. Serve these as tapas or as a main course. Feeding a large crowd? You can add some chicken skewers to the mix and you have yourself quite the feast!

steak skewers

Peruvian Lomo Saltado Marinade

What makes these skewers so delicious is the marinade that’s inspired by a very popular Peruvian dish, called Lomo Saltado (stir fried sirloin). The traditional Peruvian stir fry is made with filet mignon or sirloin strips with onions, tomatoes and french fries served over white rice. You’re probably thinking, “rice and french fries?” The first time my daughter and I tried this dish we thought the potatoes were unnecessary, but these spuds soak up all the sauce and become an integral part of this dish!

Now let’s talk about the sauce… the ingredients in traditional Lomo Saltado include soy sauce, ginger, aji amarillo (Peruvian yellow peppers) and vinegar, which are all included in my marinade. My version also includes fried potato slices because it’s a delivery vehicle for the saucy goodness. The potatoes soak up all the juices from the skewers, which is similar to the french fries soaking up the stir fry sauce. You can also make white rice on the side, if you want the full experience. 

steak skewers

Top Your Steak Skewers with Zesty Aji Sauce

But the marinade is just the beginning! The mix of tamari sauce and aji amarillo in the marinade really intensifies the umami goodness of these steak skewers. But as good as it is on its own, you can kick it up a notch by topping your steak skewers with a tangy table sauce made with peppers, parsley, vinegar and onions. 

This is similar to the ají de la casa sauce served with skewers at a local Peruvian restaurant me and the kids love, Pisco y Nazca. I haven’t cracked the code on all that is in this sauce, but my version gives the steak skewers that same intense, tangy, peppery flavor that makes me want to drink up the sauce. 

Peruvian peppers are the main ingredient in this sauce, but I didn’t have fresh ones on hand, so I improvised with jalapeño and Fresno peppers instead. The other ingredients include garlic, shallots, olive oil, red wine vinegar, tomatoes, and lots of finely chopped parsley. You can also use it as a marinade, like I did in my Peruvian-style chicken skewers

steak skewers

BBQ Good Times

There’s just something so fun about hanging out in your patio or backyard grillin’ and chllin’ with friends! While the skewers are cooking you can enjoy a little sangria or mojitos with tapas. In Miami, we can do this year-round, but we tend to avoid the summer months (too hot to handle!).

I hope you give these steak skewers a try for you next backyard party. Then, tell me all about it!

Print
clock clock iconcutlery cutlery iconflag flag iconfolder folder iconinstagram instagram iconpinterest pinterest iconfacebook facebook iconprint print iconsquares squares iconheart heart iconheart solid heart solid icon

Steak Skewers With Peruvian-Style Marinade 

  • Author: Sandi Abbott
  • Prep Time: 9
  • Cook Time: 45
  • Total Time: 54 minutes
  • Category: dinner
  • Method: grilling
  • Cuisine: Peruvian

Description

Try these steak skewers made with sirloin, lightly charred and topped with a zesty pepper sauce and placed on a bed of fried potato slices.


Ingredients

Scale

4 lbs top sirloin

2 tablespoons crushed garlic

½ cup olive oil

½ cup tamari (or use low-sodium soy sauce)

⅓ cup red wine vinegar

1 inch piece of ginger (about 1 tablespoon grated)

1 tablespoon aji amarillo paste

1 teaspoon ground black pepper

1 teaspoon ground cumin

1 tablespoon salt

1 tablespoon oregano

Wooden bamboo skewers

Aji Sauce

1 cup olive oil

¼ cup red wine vinegar

¼ cup cherry tomatoes, salted and roughly chopped

½ bushel flat-leaf parsley, finely chopped, with stems removed

½ Fresno pepper, finely diced and seeded (you can use more if you like spicy)

½ Jalapeño pepper, finely diced and seeded

1 shallot, finely diced

2 tablespoons crushed garlic, (that’s about one head of garlic, maybe more depending on the size)

1 tablespoon salt

1 teaspoon black pepper


Instructions

Make the Aji Sauce

Roughly chop the cherry tomatoes, sprinkle with salt and drain on paper towels. While the tomatoes are draining, pull out a mixing bowl so you can throw in the ingredients as you prep them.

Wash the parsley and dry with paper towels to remove excess water. Then remove the stems and finely chop. To remove the stems, you can use an herb stem stripper or just pinch the stem as you pull on the leaves with your other hand. Finely chop the parsley and add to the mixing bowl.

Cut the Fresno and jalapeño peppers in half lengthwise, remove the seeds and finely chop half of each one. Save the rest for later. Throw the diced peppers into the mixing bowl. Make sure to wash your hands after you’ve handled the peppers and do not touch your eyes!

Marinade & Skewers

Mix all the other ingredients in a mixing bowl.

Place the steak chunks in a shallow glass dish or a ziploc bag and cover with the marinade.

Marinate the steak for four hours or overnight. If the steaks are not fully submerged, make sure to turn them halfway through the marinating time.

Soak the skewers in water for at least two hours before grilling.

Grill the Steak

Cut the steak into 2 inch cubes.

Set the grill to the highest heat and let it preheat for at least ten minutes, preferably twenty. Place the skewers in the center. Cook until the meat gets nice and caramelized, about 3 minutes. Flip and cook the other side until it’s caramelized. This should take about five to eight minutes, but times will vary based on your grill, so use the times provided as a guide.


Notes

Plating Deliciousness: I love to serve these skewers on a bed of fried potato slices. Place 3-4 potato slices in a row and top with one skewer. Spoon the aji sauce on top and you’re good to go. I usually serve these on a cutting board or long serving platter. It’s quite impressive!

Serving Suggestions: Serve these skewers with a tossed salad or grilled veggies.

Nutrition

  • Serving Size: 8

Keywords: pinchos, steak skewers, beef skewers, steak pinchos

grilled chicken skewers

Chicken Skewers Peruvian-Style for Easy Summer Grilling

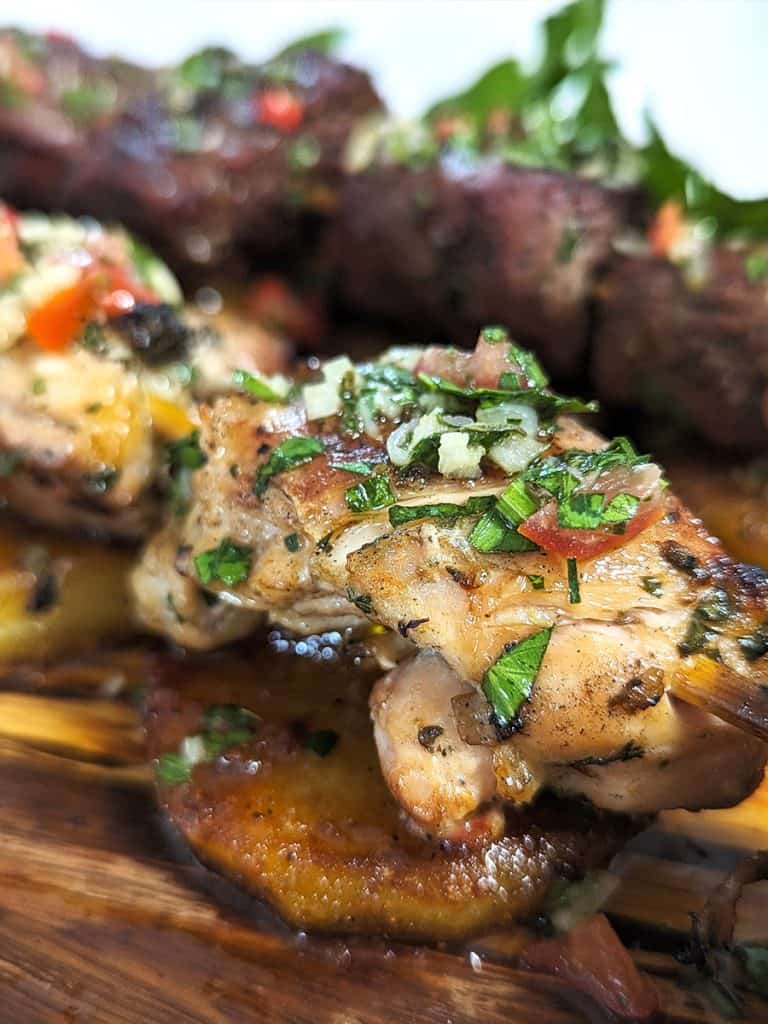
These grilled chicken skewers are easy to make and so flavorful! The recipe was inspired by the anticuchos de pollo at Pisco y Nazca, one of my favorite Peruvian restaurants in Miami. Skewers are popular in Latin cuisine and are usually called pinchos, but the Peruvian version is called anticuchos and is often made with beef hearts, steak or chicken. I love the steak and chicken versions ;-).

Whether you call them skewers, pinchos or anticuchos, these grilled chicken thighs on a stick are fun party food and just perfect for a summer barbecue. 

The Secret is in the Sauce

What makes these grilled chicken skewers so crazy delicious? It’s the Peruvian Aji Sauce served with it. When I order these at the restaurant, I always ask for extra sauce and would order a gallon of it to go if I could. It’s crazy because it’s such a simple sauce, but so good!

Aji is the Spanish word for pepper so it’s pepper sauce. Now,  I don’t have the recipe for the aji  sauce, but my son and I made our own version and it’s on point. (Can I just say how much I enjoy cooking with my son?!) 

Peruvian peppers are the main ingredient in this sauce, but I could not find fresh ones in Miami, so I improvised with jalapeño and Fresno peppers instead. The other ingredients include garlic, shallots, olive oil, red wine vinegar, tomatoes, and lots of finely chopped parsley. You just mix all these together and you’ve got yourself some magic!

This chunky sauce is easy to make and very versatile. It looks more like salsa or Argentine chimichurri. You can use it as a marinade, dipping sauce or table condiment. Pour it over steak, chicken, shrimp, potatoes, salad, bread… you get the picture! 

Marinating the Chicken Skewers

The key to flavorful chicken skewers is to marinate the meat overnight. If you don’t have that much time, try to at least marinate for four hours. This process is easy… just pour the marinade over the chicken and refrigerate, turning at least once so all the chicken pieces have  a chance to bask in the sauce.

We used half a cup of the aji sauce for 3 pounds of chicken. This recipe is best made with chicken thighs, because they have more flavor and don’t dry out like chicken breast. Chicken thighs are pretty indestructible… you’d have to try really hard to overcook them. 

We used boneless, skinless chicken thighs and left them whole. When it came time to skewer the chicken, my son folded each thigh into a C and threaded the skewer through both ends. If it’s easier, you can cut the thighs into large chunks. 

One last thing… if you’re using wooden skewers, make sure to soak them in water for at least a few hours before using. Otherwise, the grill will burn them.

 Grilling the Chicken Skewers

Now I have a confession to make… I don’t grill. I’ve always had help in that department, and I gotta tell you my son is an excellent grill master. He’s worked in restaurants for years and is an expert at cooking proteins. So, the instructions that follow are his… set the grill to the highest heat and let it preheat for at least ten minutes, preferably twenty. Place the skewers in the center. Cook until the meat gets nice and caramelized, about five minutes. Flip and cook the other side until it’s caramelized. Total time on the grill should be about eight to ten minutes, but times will vary based on your grill. Take these numbers with a grain of salt, because everyone uses a different grill and heat source, so use the times provided as a basic guide.

chicken skewers

What to serve with Grilled Chicken Skewers

The anticuchos at Pisco y Nazca are served on a bed of fried potato slices that soak up all the juicy goodness of the chicken. I have the perfect recipe for these – they are my favorite accompaniment to the skewers! A generous pour of the aji sauce on top adds amazing flavor and brightness to the dish as well.

I also make some grilled onions and peppers to go with this meal and OMG, it’s amazing and very healthy to boot. Add some grilled slices of crusty bread to dip in the sauce. Or better yet, pour the sauce over the bread… you’ll thank me for it 😉

Print
clock clock iconcutlery cutlery iconflag flag iconfolder folder iconinstagram instagram iconpinterest pinterest iconfacebook facebook iconprint print iconsquares squares iconheart heart iconheart solid heart solid icon
chicken skewers recipe

Chicken Skewers Peruvian-Style

  • Author: Sandi Abbott
  • Prep Time: 9 hours
  • Cook Time: 45 minutes
  • Total Time: 9 hours 45 minutes
  • Yield: 6 1x
  • Category: dinner
  • Method: grilling
  • Cuisine: peruvian

Description

These tasty Peruvian chicken skewers are known as anticuchos or pinchos. Served with a zesty aji sauce and fried potato slices, they are perfect for summer grilling!


Ingredients

Scale

Aji Sauce and Marinade

1 cup olive oil

¼ cup red wine vinegar

¼ cup cherry tomatoes, salted and roughly chopped

½ bushel flat-leaf parsley, finely chopped, with stems removed

½ Fresno pepper, finely diced and seeded (you can use more if you like spicy)

1 shallot, finely diced

2 tablespoons crushed garlic, (that’s about one head of garlic, maybe more depending on the size)

1 tablespoon salt

1 teaspoon black pepper

Chicken Skewers

3 lbs boneless, skinless chicken thighs

½ cup Aji Sauce and Marinade


Instructions

Aji Sauce and Marinade

Roughly chop the cherry tomatoes, sprinkle with salt and drain on paper towels. While the tomatoes are draining, pull out a mixing bowl so you can throw in the ingredients as you prep them. 

Wash the parsley and dry with paper towels to remove excess water. Then remove the stems and finely chop. To remove the stems, you can use an herb stem stripper or just pinch the stem as you pull with your other hand. Finely chop the parsley and add to the mixing bowl.

Cut the fresno pepper in half lengthwise, remove the seeds and finely chop one of the halves. Save the rest for later. If you like a lot of spice, then use the whole pepper. Throw the diced peppers into the mixing bowl. Make sure to wash your hands after you’ve handled the pepper and do not touch your eyes!

Next, finely dice the shallots and toss them into the bowl. Peel the garlic cloves and use a garlic press to crush the garlic. If you don’t have a garlic press, just finely chop the garlic. 

Add one cup of olive oil and a quarter cup of red wine vinegar. Throw in the drained tomatoes. Add the salt and pepper and taste. Add more salt and pepper if you need to. The sauce doesn’t quite live up to my hype at this point. It really needs to sit for a few hours to really shine! You’ll use half a cup for the marinade and save the rest to serve with the grilled chicken skewers.


Chicken Skewers

Trim the excess fat from the thighs and place in a shallow glass container to marinate. You can also marinate in a Ziploc bag, but that can get messy if the zip is not secure. Whatever you do, don’t use metal, as that can affect the taste of the meat.

Pour half a cup of the aji sauce and marinate 4 hours or overnight. If the chicken thighs are not fully submerged in the marinade, make sure to turn them halfway through the marinating time. 

If you’re using wood skewers, soak them while the chicken is marinating. This way, they won’t burn when you’re grilling. 

Once the chicken is done marinating, take each chicken thigh and fold into a “C” shape and thread through skewer. Or, if you prefer, you can cut the chicken thighs into 2-3 pieces and skewer the pieces. 

Let’s grill!

Set the grill to the highest heat and let it preheat for at least ten minutes, preferably twenty. Place the skewers in the center. Cook until the meat gets nice and caramelized, about five minutes. Flip and cook the other side until it’s caramelized. This should take about eight to ten minutes, but times will vary based on your grill. My son didn’t even want to give me a timing because it really varies, so use the times provided as a guide.


Notes

Plating Deliciousness: I love to serve these skewers on a bed of potato medallions. Place 3-4 potato slices in a row and top with one skewer. Spoon the aji sauce on top and you’re good to go. I usually serve these on a cutting board or long serving platter. It’s quite impressive!

Serving Suggestions: Serve these skewers with a tossed salad or grilled veggies, with a side of the dipping sauce. I will also serve grilled bread to to dip in the aji sauce.  

Keywords: peruvian chicken skewers, Peruvian Style Chicken Skewers, grilled chicken skewers, chicken skewers on the grill, chicken skewers, chicken skewers recipe

Fried Potato Slices

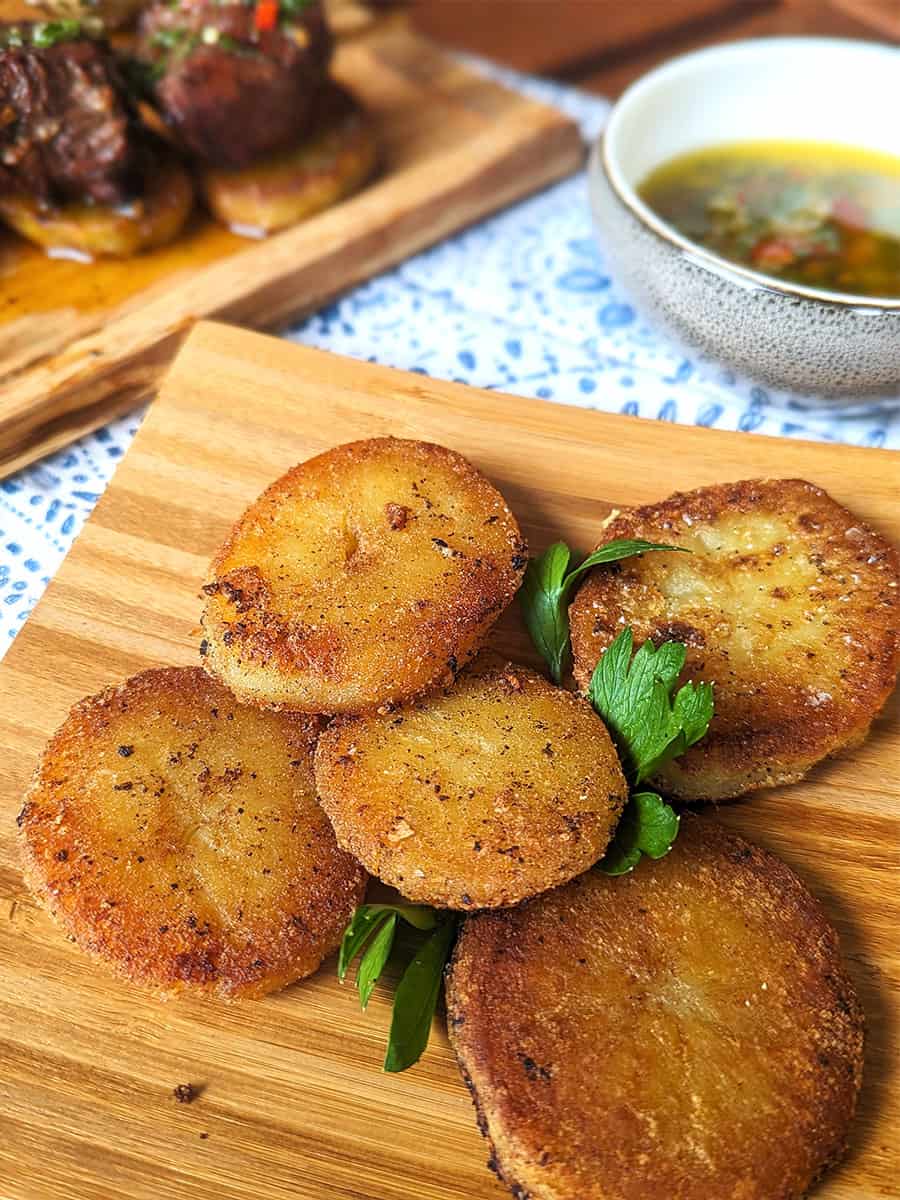
Fried Potato Slices Are Golden Delicious And Simple To Make

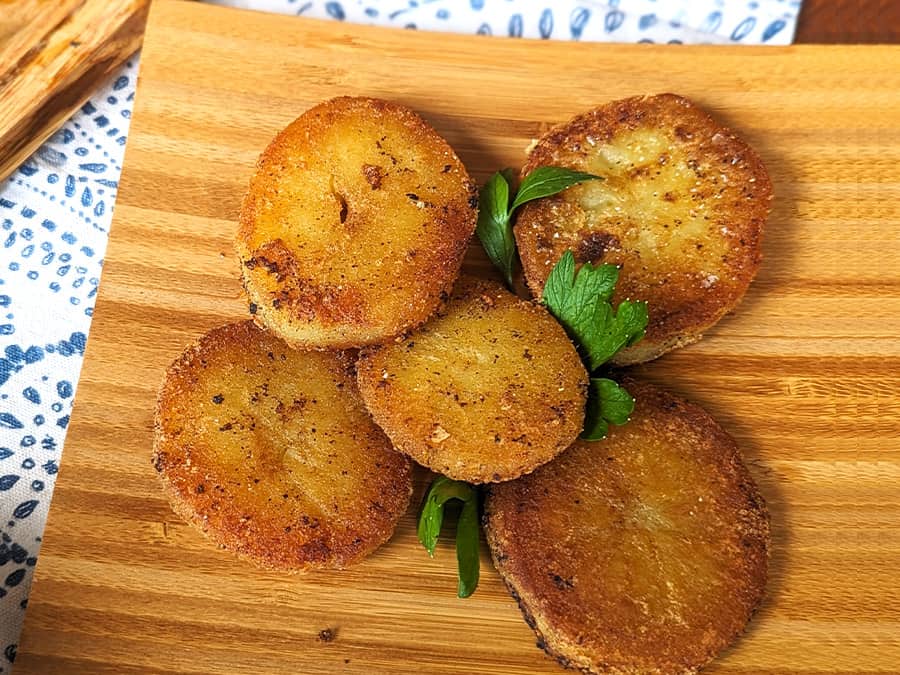
These fried potato slices are the perfect complement to so many dishes! I like to serve them with Peruvian-Style Chicken Skewers. In fact, I got the idea from one of my favorite Peruvian restaurants in Miami, Pisco y Nazca. They serve their chicken anticuchos (Peruvian-style skewers) atop fried potato slices. These little potato medallions soak up all the flavor of the chicken skewers, it’s a perfect pairing!

Yukon Gold potatoes are the best for this dish because they have a delicious balance of soft and creamy on the inside and crunchy on the outside. I peel the potatoes and then slice them into half-inch rounds. These potato medallions taste best pan-fried (doesn’t everything?). But you can just as easily make them in the air fryer or roast them in the oven which makes these potatoes easy to cook in the background while you prepare other things. 

How To Prep The Potato Slices

The potatoes in this recipe are twice-cooked. First, you boil the potatoes and then you fry them. The trick to getting the best crunchy exterior is to add a little baking soda to the boiling water. This helps break down the outside of the potato and makes for a crunchier crust. I learned this trick from Serious Eats, they really get into the science of it all.

fried potato slices

Once the potatoes are softened, transfer them to a tray lined with paper towels. The instructions change from this point on, depending on how you plan to finish cooking the potatoes.

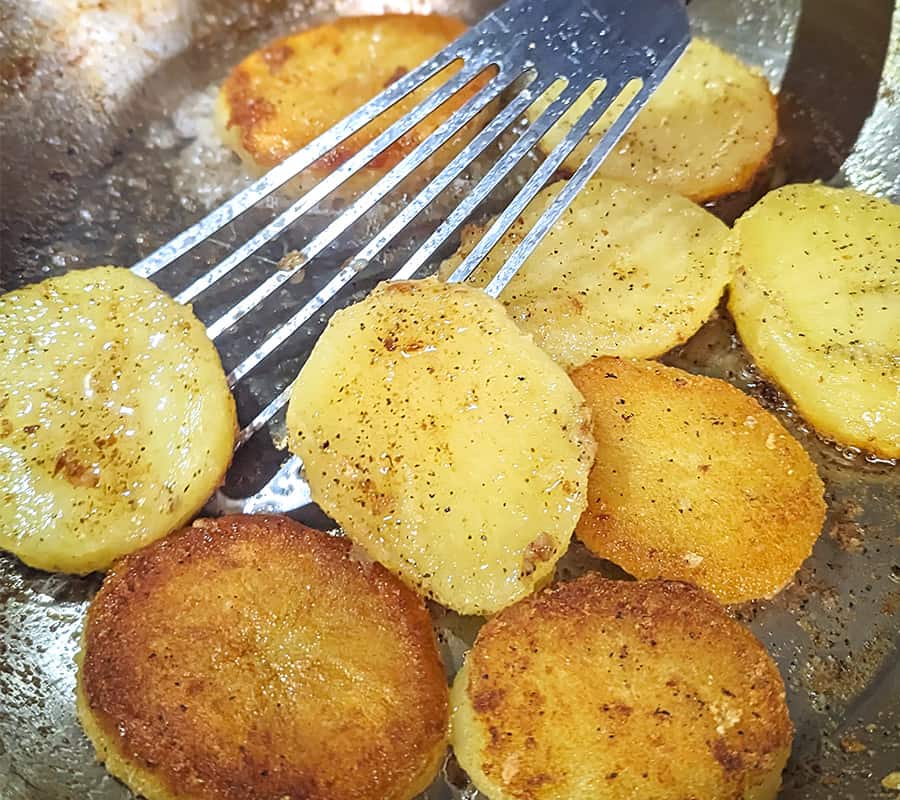
For the pan-fried version, you’ll need to heat about ¼ cup of olive oil in a skillet over medium-high heat. Season the potatoes with salt, pepper and Italian seasoning and add to the skillet. Spoon hot oil from the pan over the top, while the bottom cooks. To make it easier to scoop the oil, it helps to tilt the pan just slightly so the oil pools on one side. Once the bottom is crispy and brown, turn the slices over and cook them on the other side. This traditional French technique helps the top of the potatoes cook evenly and incorporates more flavor into the final dish.

Using this French technique transported me back to my childhood, with my mom making her fried eggs for breakfast in the same fashion. I never knew Cuban cooking had such worldwide roots! I thought it was just the Cuban way to fry eggs (so clueless!).

The pan-fried potatoes turn out evenly crispy and buttery soft on the inside. But, if you’d rather not fry, I get you. You can coat the slices in vegetable oil and cook them in the air fryer. They are not quite as good as the pan-fried version, but a very close second. To be honest, when I make these on my own, I like to use the air fryer because it’s easier and uses less oil. But if I’ve got help in the kitchen, we pan-fry.

fried potato slices

Fun And Versatile Potato Medallions

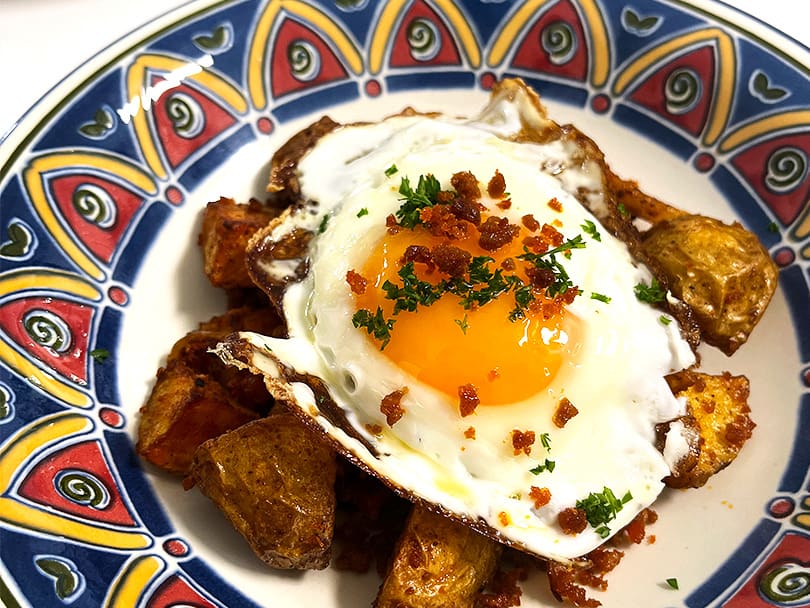
You can have lots of fun with these little fried potato slices! Consider them as a canvas for all sorts of fun toppings, like picadillo, chorizo and cheese, or Argentine sausage, onions and chimichurri sauce. Or try them with my Peruvian Chicken Skewers. You’ll love them!

Print
clock clock iconcutlery cutlery iconflag flag iconfolder folder iconinstagram instagram iconpinterest pinterest iconfacebook facebook iconprint print iconsquares squares iconheart heart iconheart solid heart solid icon

Fried Potato Slices

  • Author: Sandi Abbott
  • Prep Time: 15
  • Cook Time: 35
  • Total Time: 50 minutes
  • Yield: 6 1x
  • Category: side dish
  • Method: frying

Description

These fried potato slices are the perfect complement to so many dishes! You can use them as a base for lot of fun appetizers or serve them as a side. I like to serve them with Peruvian-Style Chicken Skewers.


Ingredients

Scale

5 large Yukon Gold Potatoes

½ teaspoon baking soda

2 tablespoon salt

1 tablespoon olive oil (for boiling the water)

1 teaspoon Italian seasoning

½ teaspoon black pepper

½ cup vegetable oil (for pan-frying) or 1/4 cup olive oil (for air fryer or oven roasting)

handful of parsley for garnish (optional)


Instructions

Set 3 quarts of water on high heat to boil, add ½ teaspoon of baking soda, a tablespoon of salt and the olive oil. As the water heats up, peel the potatoes and slice into ½ inch rounds. Once the water is boiling, add the potatoes and lower the heat slightly to a simmer. Cook for about 8-10 minutes. The potatoes should be soft enough that a fork can pierce through them, but not so soft that they fall apart. Then remove from the heat. Since stove top temperatures can vary, start checking the potatoes around minute 8.

Drain the potatoes on paper towels.

Three Ways To “Fry” The Potatoes

These potato slices are at their best when you pan-fry them. But it’s definitely easier to air fry or roast. So, below are all three methods. If I’ve got the time and the extra help in the kitchen, I pan fry. But if I’m cooking solo I would air fry or roast. 

Pan Frying Method

Add enough oil to a skillet to generously coat the bottom, about ¼ – ½ cup. Set on medium-high heat. While the  pan is heating, season the potatoes with salt, pepper and Italian seasoning. Once the oil is shimmering in the fry pan, add the potato slices — enough to cover the pan in one layer, don’t crowd them. As the bottom cooks, tilt the pan and spoon the hot oil over the top, to begin cooking the top of the potatoes as well. Once the bottoms are golden brown, flip them and cook the other side. This should take roughly five minutes per side. Once done, remove from heat, drain on paper towels and garnish with parsley.Repeat until all the potatoes are done. You may need to add more oil as you go along, and slightly reduce the heat as you’re cooking to ensure the last potatoes don’t burn.


Air Fryer Method

Place the slices on a cutting board, serving platter or sheet tray in one layer. Brush oil on each slice and sprinkle salt, pepper and Italian seasoning on each slice. Turn the slices over and repeat. Add the slices in one layer to the air fryer and roast using the preset temperature and time on your air fryer. Check in on them and turn over to ensure even browning. Depending on the size of your air fryer, you may have to do this step in batches.


Sheet Pan Method

Preheat the oven to 425ºF with the sheet pan inside. While the oven preheats, place the slices on a cutting board, serving platter or sheet tray in one layer. Brush oil on each slice and sprinkle salt, pepper and Italian seasoning on each slice. Turn the slices over and repeat. Once the oven is preheated, add the slices to the hot pan in one layer and roast for 10 minutes on one side, flip and roast on the other side. Depending on your oven, you may need to give it a little more time, just check in to make sure they are evenly browning. Once browned on both sides, the potatoes are done. This should take about 20-25 minutes.


Notes

Serve with grilled chicken skewers.

Nutrition info I’m sharing is the air fryer version.

Keywords: fried potato slices, potato medallions

Cuban Style Tasajo Made With Dry Cured Beef Is So Good!

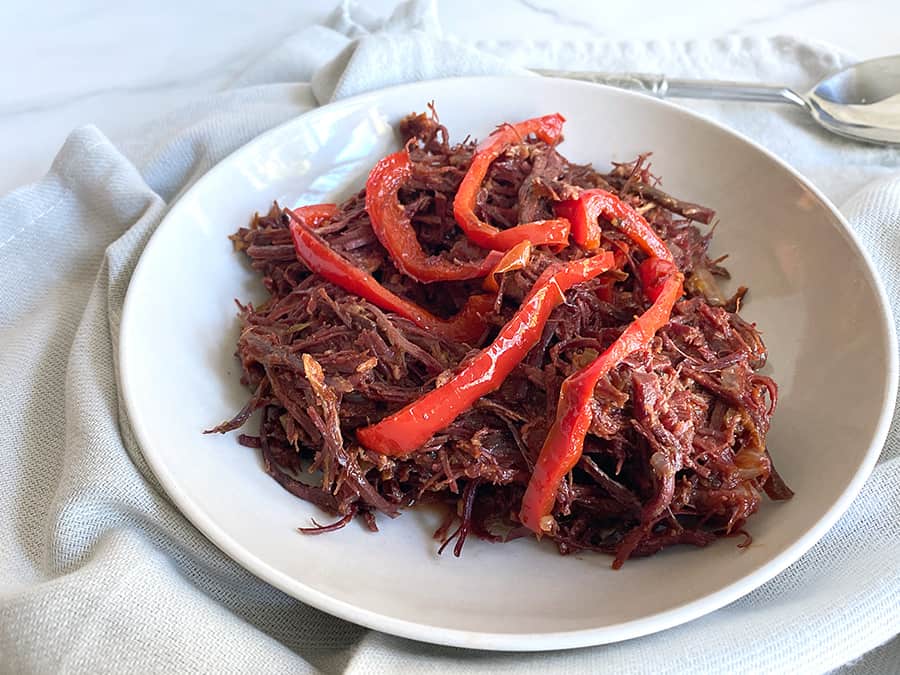
Tasajo is made from jerked beef that’s stewed in a tomato-based sauce with lots of peppers and onions. I love this dish! Every time I have a bite of Mami’s tasajo, it brings me back to the Formica dining table in our old duplex in Westchester, one of the most Latin neighborhoods in Miami (outside of Little Havana and Hialeah, of course). What I love about this dish is the saltiness and the texture.

How to best describe tasajo? It’s the salty cousin to Cuban ropa vieja. While using the same ingredients and preparation as ropa vieja, the texture and taste are transformed by the salting and drying process.

dry cured beef

What is Tasajo Cubano?

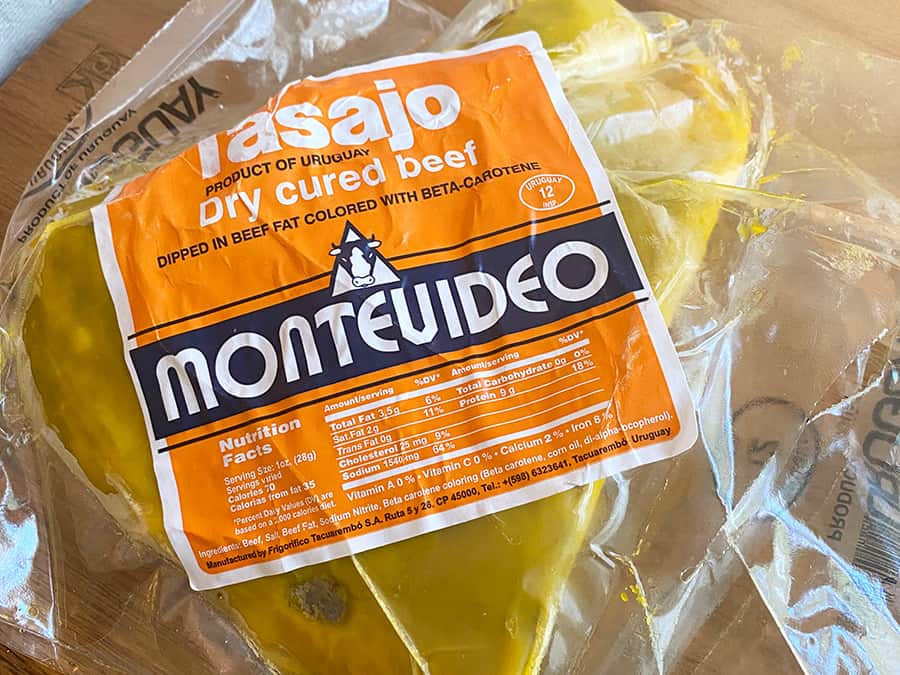
Tasajo is beef that is salted, macerated, cured, and set to dry. It does not require refrigeration and it’s a throwback to time when most homes did not have a way to refrigerate foods. Horse meat was traditionally used in Cuban tasajo, but the tasajo you find in the US is made with beef, and that’s the one I grew up eating.

You may be able to find tasajo in the meat section of your local supermarket, but not always. You’ll have much better luck finding it in Latin supermarkets, sold in vacuumed sealed packages. But if you can’t find it locally, you should be able to purchase it online. (I have not purchased from this company before and this is not an affiliate link.)

tasajo

Start this recipe the day before

Not gonna lie, this dish takes a while, but it’s worth it! First, you need to remove it from its packaging and soak overnight to remove some of the salt. The tasajo meat is covered in an orange layer of fat. The orange color is due to the beta carotene.

You can remove this layer of fat and soak it, but I don’t usually bother removing it (call me lazy… but Mami does it the same way). For those of you who are more industrious, you can remove the orange layer by scraping it off and washing with warm water. Divide the meat into 2-3 pieces, cutting against the grain.

Cooking and prepping

The next day, drain the tasajo and place in a pot with fresh water. Turn up the heat until the water begins to boil. Lower and simmer for 20 minutes or so. The orange layer will melt away. ­Drain and repeat the process, boiling for another 20 minutes. Drain once more and let it cool. If you’re in a hurry, you place it in the refrigerator to cool.

Once cooled, shred the meat with your fingers and remove any fatty pieces you find. Taste for saltiness and rinse over warm water if it’s too salty for your taste. From this point on, the process is very similar to making ropa vieja.

Cut half an onion, and a red bell pepper into slices and crush two garlic cloves. Set a sauté pan over medium heat, add a few tablespoons of olive oil and sauté the onions and peppers until translucent. Add the crushed garlic and cook for another minute. Then, add the tomato sauce, cooking wine, cumin, oregano and pepper. Add the shredded beef and simmer for 20-30 minutes. Adjust seasonings as needed and serve. Que rico!

tasajo

What To Serve with Cuban Tasajo

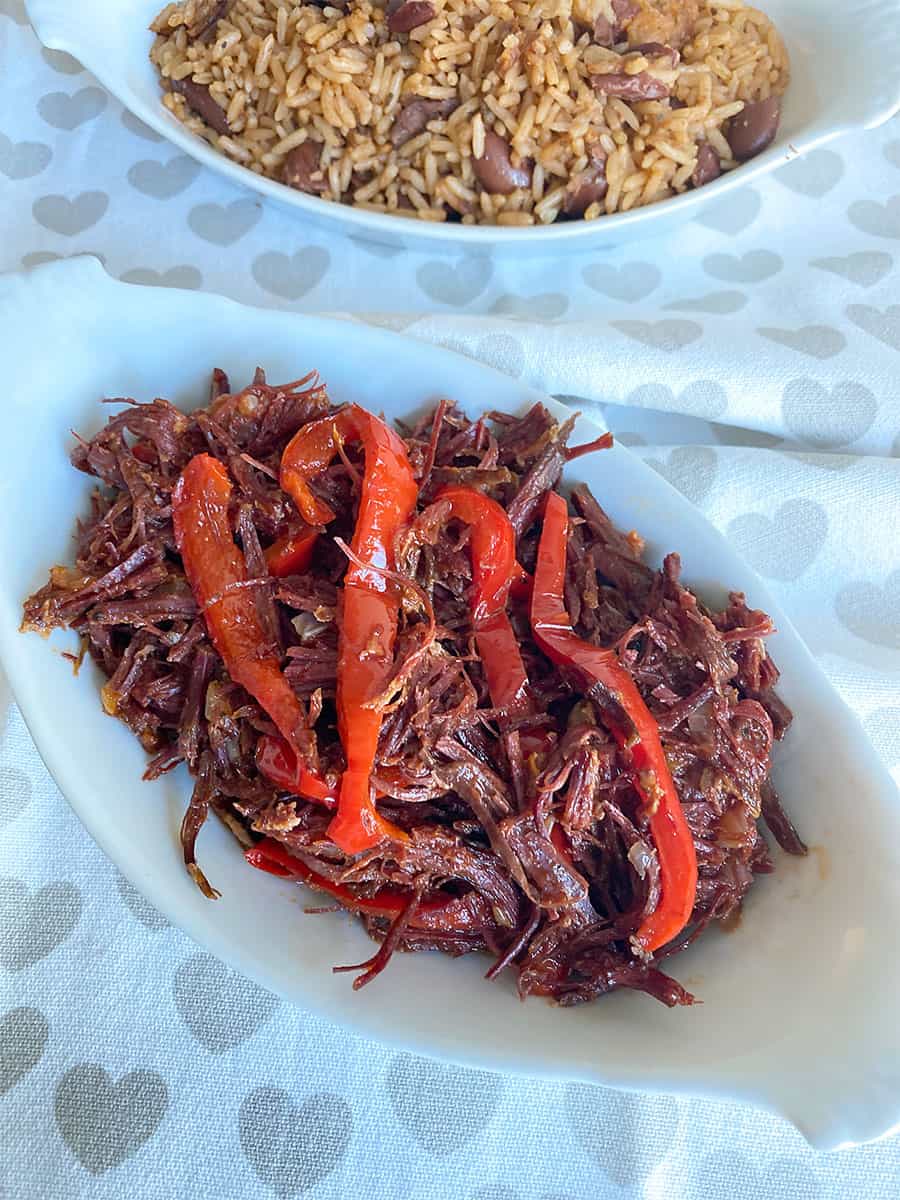
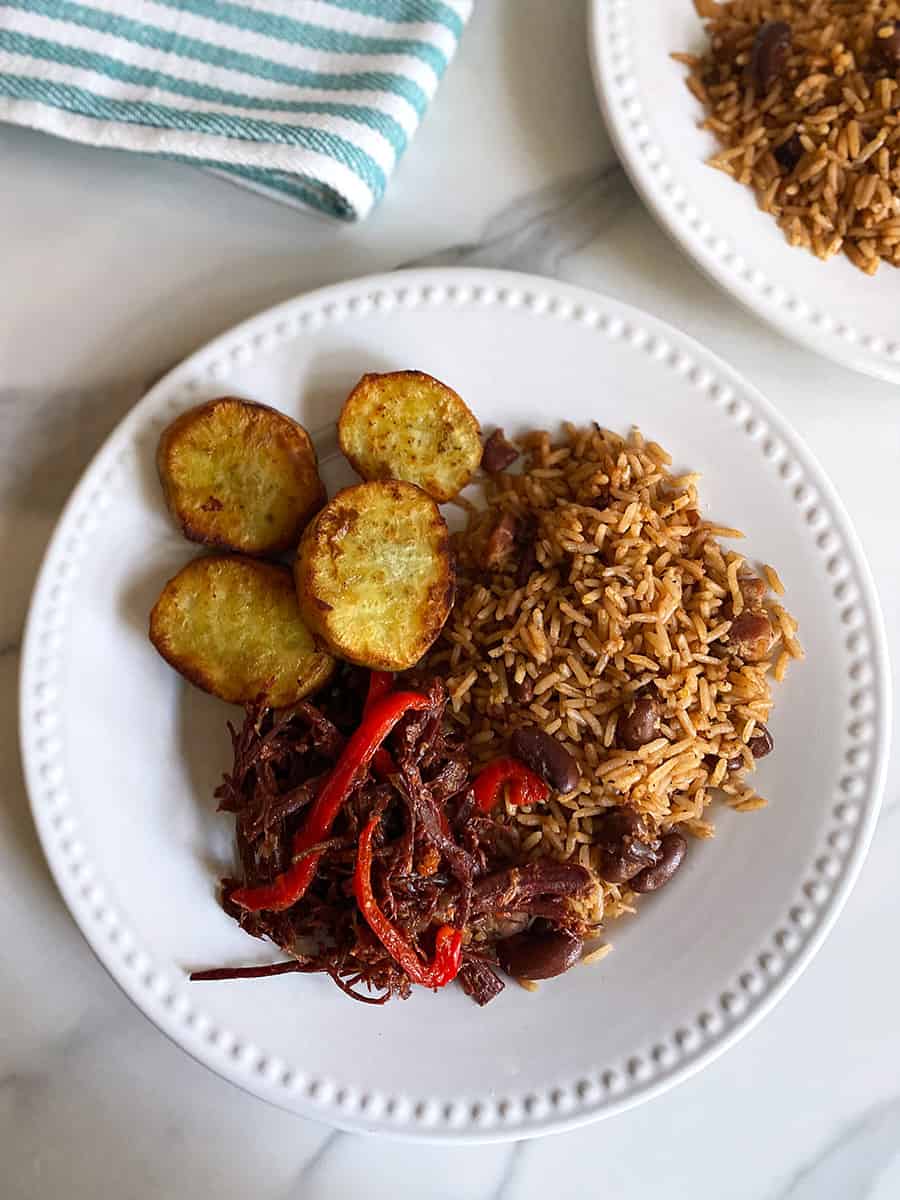
Serve this dish with congri rice and boniato, a Cuban sweet potato. The dry, cured beef is rather salty so the mild flavor of the rice and beans and the sweetness of the boniato truly balances the dish… and I would argue it’s a must. 

You can make congri rice with black beans or red beans. For this blog post, I paired this dish with the red bean congri, but it’s just as tasty with the black bean congri. Actually, the black bean version, also known as Moros y Cristianos, is the more popular rice dish.

boniato

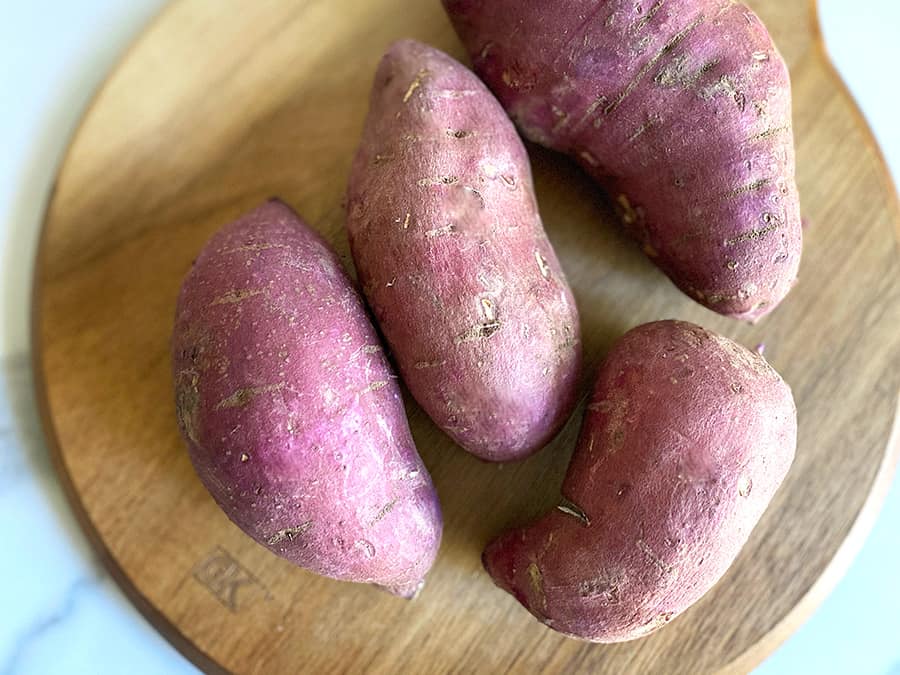
Boniato is a Cuban potato that is white and slightly sweet. If you can’t find it, substitute with sweet potato. You can cut into chunks or rounds and boil it, roast it, fry it or stew it along with the meat. If you decide to stew it, you’ll need to add a little more sauce to the dish, so double the tomato sauce and cooking wine. Also add a bit of water if you notice the sauce is drying up.

bean train food for thought

As I was working on this recipe, I thought about the importance of balance. The salty tasajo really needs the counterpoint of the sweet boniato to really shine.

We all need a little balance in life, like ying and yang, sweet and salty, fire and ice.

Community helps us find this balance. Friends, family and significant others require us to make changes, to compromise, to let go of some things to accommodate others. We may not always like how messy this can be, but just like with cooking, a messy kitchen can lead to a spectacular feast.

So the next time you’re wishing someone would see things your way, do things your way or let you have your way,  just think of how delicious it could be to embrace a different perspective, a new approach, a road less familiar to you.

Savor every moment, every bite, every fork in the road.

Print
clock clock iconcutlery cutlery iconflag flag iconfolder folder iconinstagram instagram iconpinterest pinterest iconfacebook facebook iconprint print iconsquares squares iconheart heart iconheart solid heart solid icon
tasajo

Cuban Style Tasajo Made With Dry Cured Beef Is So Good!

  • Author: Sandi Abbott
  • Prep Time: Soak overnight, 15 minutes of prep
  • Cook Time: 45 minutes
  • Total Time: 1 hour
  • Yield: 4 servings 1x
  • Category: Entree
  • Method: Stovetop
  • Cuisine: Cuban

Description

Tasajo is dry cured beef that’s stewed in tomato sauce with onions, red bell peppers and savory spices. It’s the salty cousin to Cuban ropa vieja. 


Ingredients

Scale

1 lb tasajo (dry, cured beef) See note

½ a small onion (1/2 cup), chopped

2 garlic cloves, crushed

Half a red bell pepper, cut into strips

½ cup tomato sauce

2 tablespoons cooking wine

½ teaspoon oregano

½ teaspoon cumin

1/4 teaspoon black pepper


Instructions

Tasajo Prep:

Start the day before. Remove the tasajo from its vacuum sealed package and cut into 2-3 pieces, across the grain. Set in a bowl and cover with water and let it soak overnight. You can leave it out or refrigerate, whatever you prefer.

The tasajo is covered with an orange fat layer. You can rinse this off or leave it on, either way it’s OK.

The next day, drain the water. Add the tasajo to a pot filled with water. Boil for 20 minutes. The orange layer will melt away.

Change water and bring to a boil and boil for another 20 minutes.

Remove the beef from the water and let it cool. Shred the beef with your fingers and remove any fatty tissue.

Chop the onion, cut the red bell pepper into slices, crush the garlic.

Take 2 tablespoons of olive oil and sauté onions and peppers until translucent, about 5 minutes. Add the garlic and cook until fragrant, about 1 minute. Add the beef, tomato sauce and cooking wine. Cook for about 15-20  minutes (if it’s a bit dry, add a ¼ cup of water).

Serve with congri and fried boniato. See note.


Notes

Tasajo is sold in vacuum sealed packages, and it’s covered with a bright orange layer of waxy fat. Don’t be put off by this, this layer helps preserve the meat and it melts away when you boil it. You should be able to find this specialty beef at most Latin supermarkets.

Boniato is a Cuban sweet potato that’s traditionally served with the tasajo. The sweetness of the potato helps balance the saltiness of the beef. If you can’t find boniato, substitute with sweet potato. Cut the potato into chunks or quarter inch think rounds, then roast or fry. You can also boil the potato (I never boil, though. It’s so much tastier when it’s fried or roasted.

Keywords: tasajo, cuban tasajo, tasajo cubano, cured dry beef

Cuban red beans and rice

I love Smokey Arroz Congri, (Cuban Red Beans and Rice)

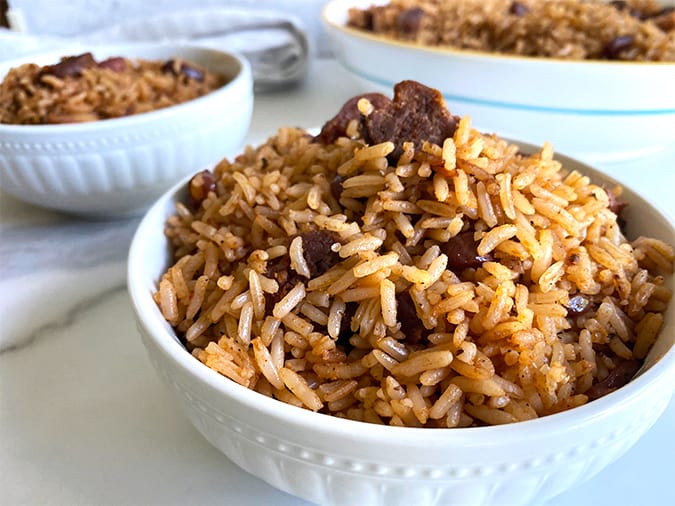
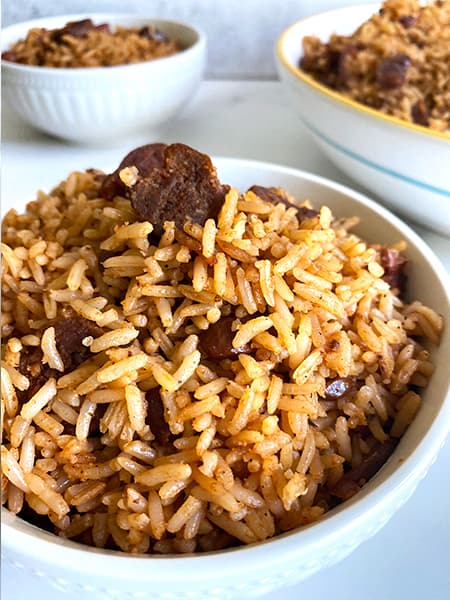
I love, love arroz congri made with red beans, Spanish chorizo and salt pork. There are different variations on this dish, but what I love about Cuban red beans and rice is the smoky, salty flavors of cured meats mixed with cumin and oregano. It’s perfect with chicken, beef, and pork. 

Cuban cooking is very non-nonsense, easy to make and easy on the budget. With one bag of red kidney beans and three cups of rice you can make enough servings to feed 10 – 12 people, so you’re sure to have leftovers. 

Congri Cubano

Chorizo is The Key Ingredient in Cuban Red Beans and Rice

You want to use Spanish chorizo for this recipe. This sausage is cured and can usually be found in the same section as pepperoni. You may also come across Mexican chorizo in your search, but that’s usually raw and tastes very different. If you can’t find the Spanish chorizo at your local supermarket, you can buy it from Amazon. I like to use the Palacios Brand for my recipes. 

Salt pork is used in Southern cooking so it’s easy to find in most supermarkets. If you don’t have it, you can substitute bacon (but you may want to make some extra… it’s hard not to eat it while you’re cooking!)

Soak And Cook The Red Kidney Beans

It’s really tempting to take a shortcut and use canned beans to make this arroz congri, but you get the best results when you cook the beans from scratch. The bean broth adds a lot of flavor that balances the spices and the saltiness of the chorizo and salt pork. 

The biggest time issue is soaking the beans for a few hours before you start the cooking process. If you plan ahead you can soak beans in the morning or the night before. 

You don’t absolutely have to soak the beans, but it is recommended. My mom always did it this way and it turns out it’s for the best. Soaking the beans helps remove some of the harmful anti-nutrient compounds, plus it reduces the complex sugars that can lead to gassy side effects. 

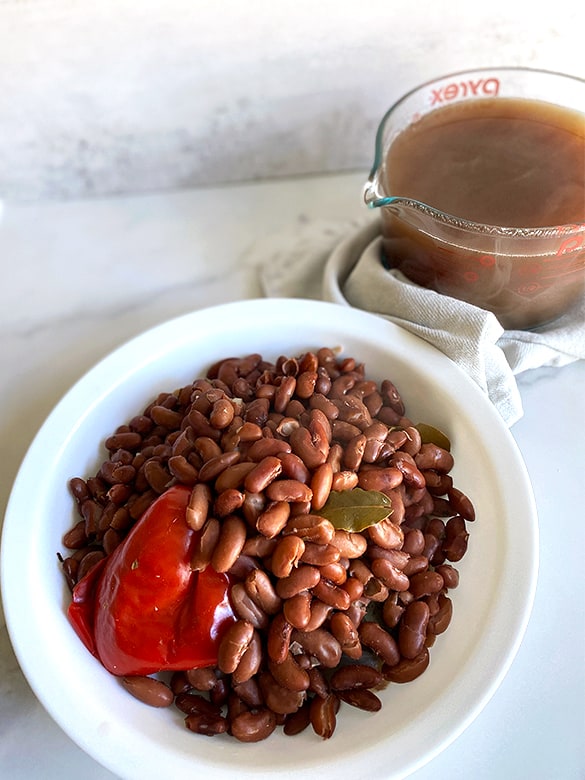
The process of cooking the beans is easy. You just bring the beans to a boil, throw in half a whole onion, half a whole bell pepper, a few bay leaves and garlic cloves and set to simmer. It takes about 1-2 hours on the stove top, but you can shorten the time using an instant pot. To check them for doneness, take a few beans out, run it through some cold water and taste it. It should be soft but not mushy.

Cuban red beans and rice

Do This While the Red Beans Are Simmering

When the beans are almost ready, start prepping the rest of the arroz congri ingredients.

Chop the rest of the white onion and bell pepper and crush two garlic cloves. Cube the salt pork into quarter inch pieces and slice the chorizo into half-inch rounds. Rinse the rice.

Once the beans are cooked, strain the beans and reserve in a separate container. If you leave the beans in the hot liquid, they will continue to soften and can turn mushy.

Heat a skillet over medium heat, add a little water and cook the salt pork. Once the water evaporates, add a little olive and cook until golden brown. Throw in the onions, peppers, and garlic and sauté for a few minutes, until the onions are translucent. Add the chorizo and cook just a bit to release some of the color. Then add the rice and sauté for a few more minutes. 

Add the bean broth and the beans, bring to a boil then lower the heat, cover, and simmer for about half an hour, or until all the water is absorbed. You won’t be using all the beans and the broth, so that you can use freeze the leftover beans and broth to make this recipe again.

arroz congri

Batch and Freeze for Ease (Sorry for the cheesy line, but I couldn’t resist!)

This recipe takes a little time, but it’s worth it. You can shorten the time by cooking the beans the day before. The simmering is super low maintenance and can be done while you do other things. And since this recipe makes about 14 cups of arroz congri, you can freeze what you don’t use for the next time. I do that all the time, it freezes well.

Cuban Congri Rice
Cuban Black Beans and Rice

Try Cuban Congri Rice is Made with Black Bean Too

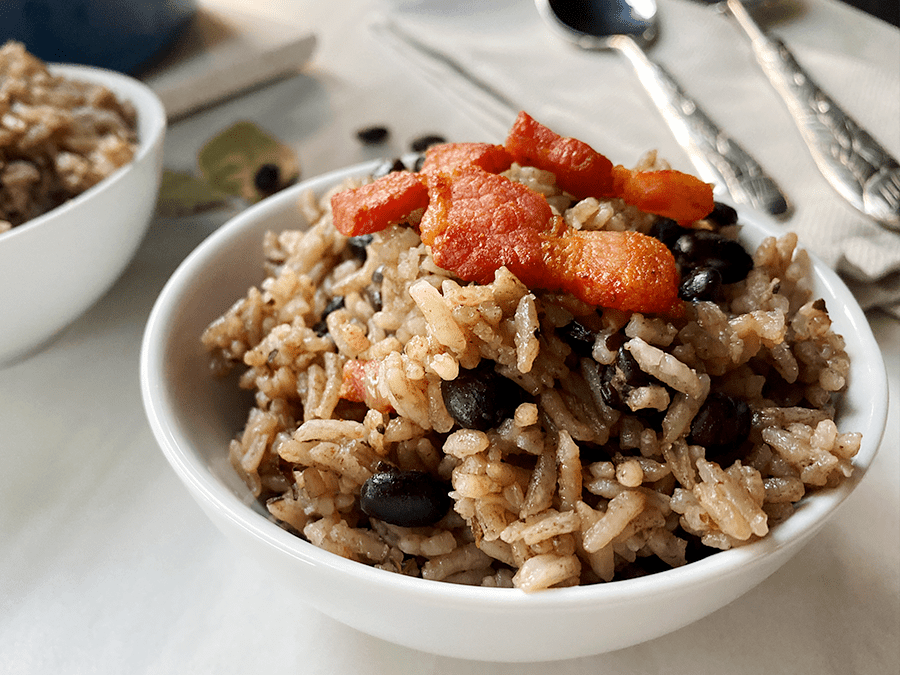
A very popular version of Cuban congri rice is made with black beans. While it’s a similar cooking process, the flavor is different and relies more on the salt pork. I love this version too, especially with lots of crispy tocino (salt pork) on top!

bean train food for thought

It felt so good to work on this post! I’ve had quite a few changes in my life during the last year and it caused me to stop blogging altogether.

The last time I was cooking in the kitchen with Mami, I made congri rice and tasajo (recipe coming soon). I thought I’d get to post it back in January, but instead I had to pack all my kitchen stuff for a while. I’ve moved twice during this time and I’m currently in the middle of a kitchen renovation. OMG! 🤯 I have NO KITCHEN right now and haven’t cooked in months.

The process of preparing this post made me feel like my life was getting back to normal. By normal I mean I was going back to a place and activity that makes me feel connected and happy.

Whatever changes, ups and downs life brings, we need to make an effort to stay grounded and connected… with the people, places and things that bring us joy and peace. It’s OK to wander for a bit in the midst of change, in fact, it may be just what you need. But it feels so good to come home again. 

Whatever is going on in your life, take the time to feed your soul. You’ll need the nourishment to welcome growth and opportunity. Taking care of yourself is not selfish, it’s the best gift you can give the people you love. 

Print
clock clock iconcutlery cutlery iconflag flag iconfolder folder iconinstagram instagram iconpinterest pinterest iconfacebook facebook iconprint print iconsquares squares iconheart heart iconheart solid heart solid icon
arroz congri

I love Smokey Arroz Congri, (Cuban Red Beans and Rice)

  • Author: Sandi Abbott
  • Prep Time: 10 minutes
  • Soak Time: 6 hours
  • Cook Time: 1 hour, 15 minutes
  • Total Time: 7 hours 25 minutes
  • Yield: 14 cups 1x
  • Category: Side Dish
  • Method: Stove
  • Cuisine: Cuban

Description

This Cuban red beans and rice recipe is packed with salty, smokey flavors of Spanish chorizo, smoked paprika and salt pork. It’s the perfect complement to your favorite chicken, pork and beef dishes!


Ingredients

Scale

1 bag uncooked red beans (14 ounce)

1 medium onion, divided in half (you’ll chop one half and leave the other half whole)

1 medium red bell pepper divided in half (you’ll chop one half and leave the other half whole)

5 garlic cloves 

3 bay leaves

1 teaspoon oregano

1/2 teaspoon black pepper

¼ teaspoon cumin

1 teaspoon paprika (I like to use smoked paprika for this!)

2 teaspoons salt

5 ounces Spanish chorizo (about 2 sausage links)

3 ounces salt pork

3 cups uncooked white rice

3 tablespoons olive oil or pork fat


Instructions

To Cook the Beans

Soak beans for 4-6 hours or overnight. (See note below.)

Drain the beans and add to a cooking pot with eight cups of water. 

Add half of the onion and bell pepper to the pot. Don’t chop the onion and peppers in this step, because we’ll want to remove the pieces once the beans are cooked. 

Add three garlic cloves and two bay leaves and set the beans to boil. Once it begins to boil, lower the heat to a simmer and cook for 1 1/2 hours. Check for doneness after an hour and keep checking until the beans are soft enough to be mashed, but not mushy. They should still have bite to them, like al dente pasta. 

If you’re using an Instant Pot affiliate link, cook for 12 minutes.

Remove the onion, pepper, garlic cloves and bay leaf. Drain the beans and reserve the liquid (bean broth). You want to make sure to separate the beans from the bean broth. Otherwise, the beans will continue to cook in the hot liquid and can become mushy. You want them to be just a bit undercooked because they’ll finish cooking with the rice. 

You’ll need 2 ¼ cup cooked read beans and 4 cups bean broth.

You can use the leftover beans and broth to make a half batch of red bean soup, or you can freeze the beans and broth in separate containers to make this congri rice again. 

To Make the Arroz Congri

Chop the other half of the onion and bell pepper and crush the remaining garlic cloves. 

To a skillet, add the salt pork with ¼ cup water over medium high heat and cook until water evaporates and the fat renders. Add 3 tablespoons of pork grease or olive oil and cook until the pork is browned. 

Add the onions, garlic, red bell pepper and sauté until softened. Add the chorizo and cook for about 1 minute.

Add the rice, cumin, black pepper, paprika, bay leaf and cook for 3 minutes. Add the broth and the beans. Add the 2 teaspoons of salt and taste. Adjust seasonings as desired. My mom’s recipe is a bit light on the spices, so feel free to add more to suit your preference. 

Bring to a boil and then lower the heat to medium low and cover. Cook until the water is absorbed, and the rice is cooked. About 25 minutes. If you find that the rice is not done, just add about a quarter to a half a cup and continue to cook until done. Check it every 10 minutes. 

Makes 14 cups rice


Notes

You don’t absolutely have to soak the beans, but it is recommended. Soaking the beans helps remove some of the harmful anti-nutrient compounds, plus it reduces the complex sugars that can lead to gassy side effects. 

Cook time shown is based on using an Instant Pot affiliate link. Add an extra 1 1/2 hours if you’re simmering the beans on the stove top. 

You can freeze leftovers and reheat it in the microwave. I like to place a damp cloth over the rice to keep it moist as it cooks, it also keeps the beans from bursting. 

Keywords: ipe for red beans and rice, arroz congri, congri Cubano, Spanish red beans and rice, Cuban red beans and rice, congri recipe, Cuban congri, recipe for red beans and rice

chicken soup

This Cuban Chicken Soup Makes You Feel Loved!

Comforting Cuban chicken soup is on every abuela’s arsenal! This is the cure if anyone has a cold or is just a bit under the weather! Chicken noodle soup seems so basic I almost didn’t add this recipe to the blog, but it’s my favorite soup and it just takes me back to my childhood and feeling loved on when I had a cold. Lots of love goes into making this Cuban chicken soup and even if it doesn’t cure the common cold, it cures the common cold blues.

While it’s packed with love, this homemade Cuban chicken noodle soup is super simple to make. The first time I made it on my own, I got it all wrong because I added too many seasonings, and the broth was not clear and golden like Mami’s. It didn’t taste anything like her Cuban chicken soup.

chicken soup

Cuban Chicken Soup Like Mami Makes

I called Mami to see where I had gone wrong. Here’s what she told me:

  • Use dark meat with the bones to make the soup. This is what gives the broth such a great flavor. 
  • Add onions, garlic, green peppers, tomato, carrots, celery, culantro and and bay leaves to the chicken and simmer for an hour. Culantro is a long leaf often used in Cuban cooking. You can find it with the other herbs. But if you can’t find it, don’t sweat it. I don’t always add it.
  • Strain the soup and press all the vegetables through a sieve to get all the flavor out of it. Mami likes to use a pestle to squeeze every bit of flavor out of the veggies and into the soup.  
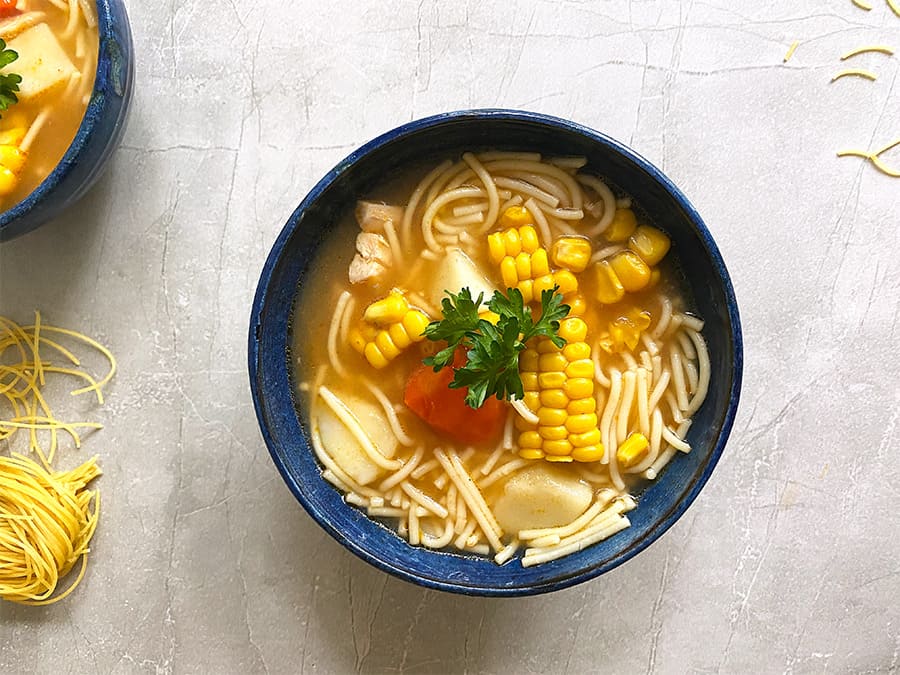
  • Then add potatoes, fresh carrots, corn cobettes, and noodles. Add salt to taste. Chop the chicken and add it back into the soup. 

I made a few of my own edits to her Cuban chicken soup. I use red bell pepper instead of green pepper, and I add some saffron threads at the end. It gives the soup great flavor and a nice, golden color. Mami uses Bijol, a red food coloring used in many Cuban dishes. But I don’t like using the coloring, so I usually use paprika and/or saffron for flavor and golden color. Saffron is used in Spanish cooking, especially in making paella. But I love the flavor so much, I add it to many dishes, including chicken soup.

chicken soup

The Best Noodles for Cuban Chicken Noodle Soup

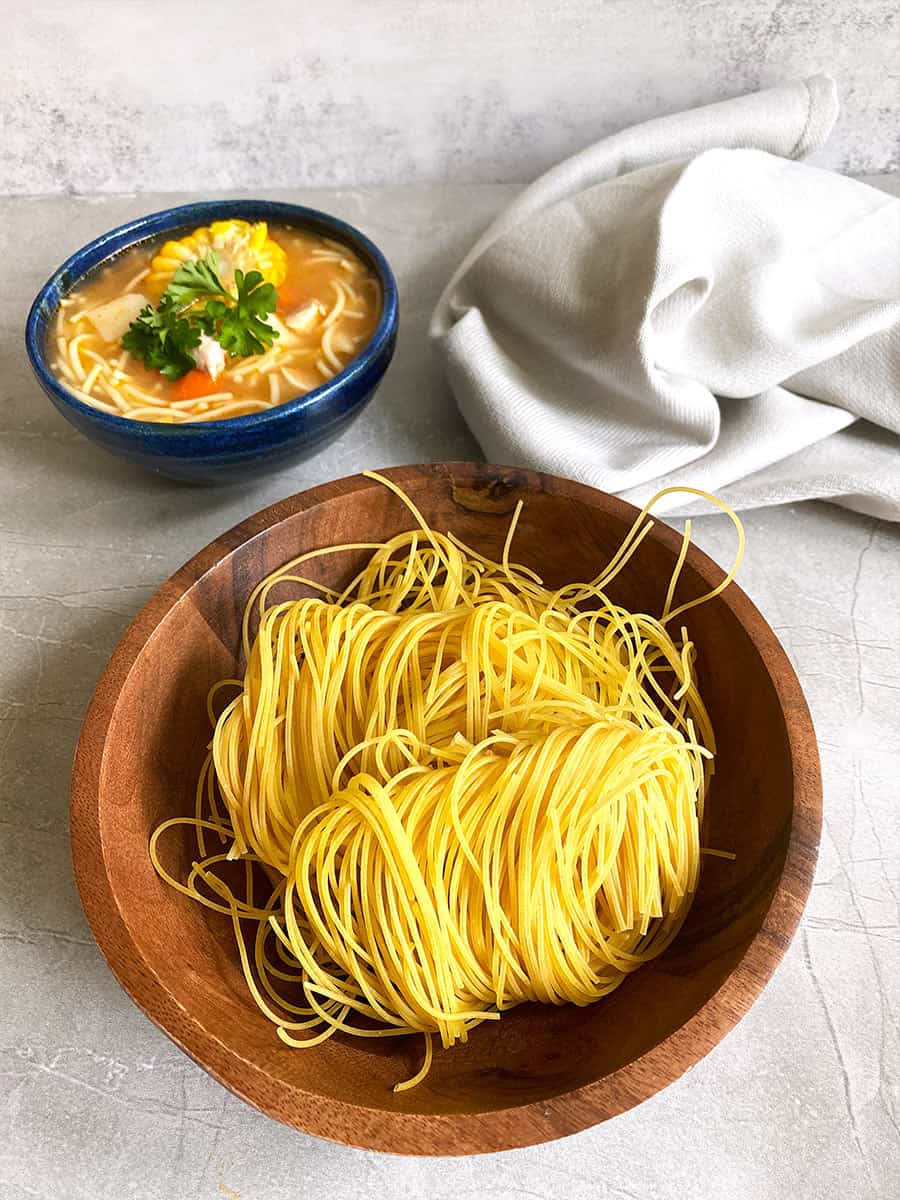
Cubans use fideos to make this chicken soup. These noodles are as thin as angel hair and are shaped into little bundles. You can make it with angel hair pasta, but I really love using these! Maybe it’s because I grew up eating them, or maybe it’s because they look like little birds’ nests. I like my soup with three little bundles, which I break up just before adding. If you can’t find these in the grocery store, you can also make it with angel hair pasta. If you use angel hair, break up the noodles before adding them to the soup.

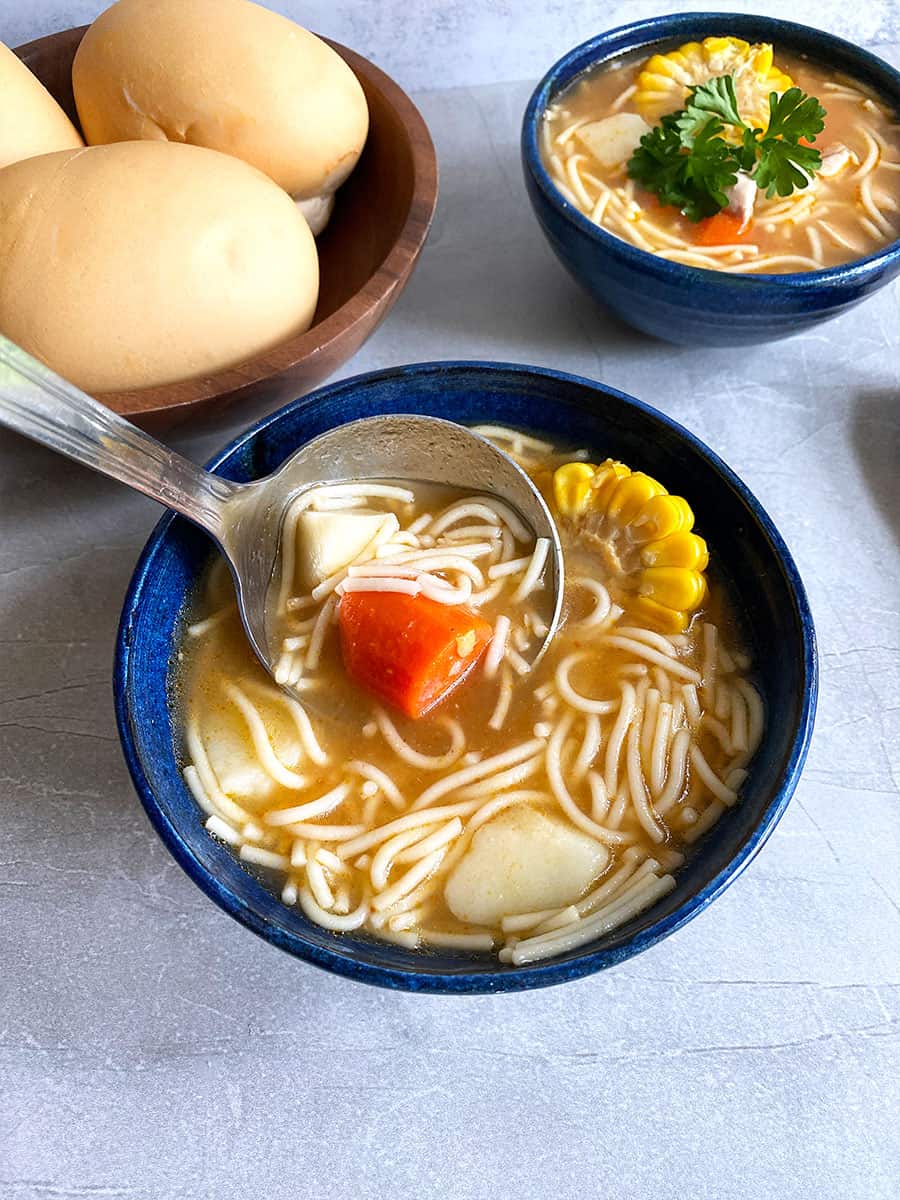
This Cuban chicken soup really hits the spot when you’re sick! But really, it hits the spot all the time, especially with a thick slice of buttered Cuban bread.

So, I made my Cuban chicken noodle soup today. When my daughter walked into the kitchen and smelled it, she wanted to know who was sick. Yea, I pretty much make this soup when someone is sick. But, I should make it more often because it’s delicious!

Bean Train Food For Thought

Food associations are so strong! I have such vivid memories of having a comforting bowl of my mom’s delicious Cuban chicken soup when I was sick. It made me feel loved and cared for. So, I do the same thing for my kids. But I really shouldn’t wait until they’re sick to love on them with this soup.

Sometimes we save certain things for special occasions, but every day can be remarkable. Life is too short to limit the good stuff for just sometimes. So this Cuban chicken soup, hugs and kisses, and quality time are for every day because every day is special. ❤️

Print
clock clock iconcutlery cutlery iconflag flag iconfolder folder iconinstagram instagram iconpinterest pinterest iconfacebook facebook iconprint print iconsquares squares iconheart heart iconheart solid heart solid icon
chicken soup

Comforting Cuban Chicken Soup Is Just What The Doctor Ordered!

  • Author: Sandi Abbott
  • Prep Time: 30
  • Cook Time: 90
  • Total Time: 2 hours
  • Yield: 6 servings 1x
  • Category: soups
  • Method: stovetop
  • Cuisine: cuban

Description

This Cuban Chicken Soup is comforting and satisfying! It’s perfect for a cold day or when you’re feeling under the weather. 


Ingredients

Scale

For the stock:

1.5 lbs skinned chicken thighs  

1/2 medium onion, cut in half  

2 celery stalks, cut in half with the leaves  

3 garlic cloves, peeled  

2 culantro leaves (see note)

1 tomato, cut in half  

1 carrot

1/4 bell pepper (green or red is fine)

2 bay leaves

1 teaspoon salt

For the soup:

1 small potato, peeled and cut into one-inch pieces  

2 carrots, sliced into quarter-inch rounds

4 corn cobettes  

2 to 3 bundles of fideos (see note)

One pinch Saffron affiliate link threads or a teaspoon paprika

Salt and pepper to taste

Lime wedges for serving


Instructions

Make the Stock:

  • Fill a stockpot with water about 3/4 full (approx 12 cups). Add the chicken, onion, celery stalks, garlic, tomato, carrot, bell pepper, culantro and and bay leaves. Bring it to a boil, and lower the heat and simmer for an hour. 
  • Remove the chicken with a slotted spoon, then strain the stock. Mash the vegetables through the strainer with the back of a spoon or a pestel. Scrape the bottom of the strainer, too. This will help capture every bit of flavor. 

Make the soup:

  • Peel and cut the potatoes into one-inch pieces. Peel and slice the carrots into quarter-inch rounds. Chop the chicken into bite-size pieces. 
  • Add the broth back to the pot and then throw in the potatoes, carrots, corn, and a pinch saffron threads or a teaspoon of paprika. Bring to a boil, add the noodles and cook until the noodles are softened. Taste and add salt as needed necessary. 
  • Now about the corn. I usually take these out and cut the corn kernels and add them back to the soup. Or you can leave the cobettes in. I like using corn cobettes instead of frozen corn because the husk gives the soup extra flavor.
  • Serve with Cuban bread, of course! 

Notes

You can use Latin-style fideos or angel hair. The amount of noodles will vary based on how you like your soup. I use 3 little bundles of fideos because we like it with a lot of noodles. You can substitute about 2-3 ounces of angel hair pasta. 

Culantro is an herb used in Cuban cooking. It has long leaves and can usually be found with the other herbs. But if you can’t find, don’t sweat it. 

Keywords: Cuban Chicken Soup, Cuban Chicken Soup Recipe, Cuban Chicken Noodle Soup, chicken noodle soup, homemade chicken soup

Cuban Meringue Cookies

Sweet and Easy Cuban Meringue Cookies (aka Merenguitos)

These meringue cookies, known as merenguitos, are a traditional Cuban cookie that’s easy to make with just five ingredients! It’s the perfect treat to whip up with the leftover egg whites you’ll have after making crema de vie (aka Cuban eggnog). Crema de vie and merenguitos are quite pair at Christmas time!


You can find these little merenguitos at most grocery stores in Miami, but I don’t really like the store-bought ones because they are very crisp. I like them when they are slightly crunchy on the outside, and the inside is soft and chewy, just like a marshmallow. You can control how crispy they get by the amount of time you bake them.

meringue


5-ingredient Meringue Cookies

These little meringue cookies have no flour… you just need egg whites, sugar, vanilla and cream of tartar. I like to add a little flavored liquor like Amaretto, but it’s not traditional. You can also add a little colored sugar crystals to match your theme, like these red crystals for Christmas.

Just whip the egg whites until foamy, add the sugar gradually and beat until stiff peaks form. You know the meringue is stiff enough when it can hold its shape when the whip is turned upside down. Then, add the vanilla, Amaretto (if using) and cream of tartar, and beat another thirty seconds.

You can spoon the egg whites onto a baking sheet covered with parchment paper, or you can use a pastry bag to pipe the meringue into pretty, little fluted mounds. I used a Wilton 1M tip to do this.

Next you can sprinkle tiny sugar crystals on top, then stick in an oven set to 200 degrees, and cook for 45 minutes. If you want them to be a bit crisper, you can leave them in the oven until they are cooled.

Cuban Meringue Cookies


Fun Variations For the Merenguitos


You can have some fun with these! Add other great toppings such as unsweetened flaked coconut, cocoa powder or cinnamon. I use unsweetened since the meringue is sweet enough.

You can also fold in a bit of food coloring to the meringue before piping if you want pastel-colored merenguitos. These are fun at baby showers!

And you can also sandwich two merenguitos with a little dulce de leche. Really addicting this way!

merenguitos
Print
clock clock iconcutlery cutlery iconflag flag iconfolder folder iconinstagram instagram iconpinterest pinterest iconfacebook facebook iconprint print iconsquares squares iconheart heart iconheart solid heart solid icon
Cuban Meringue Cookies

Sweet and Easy Cuban Meringue Cookies (aka Merenguitos)

  • Author: Sandi Abbott
  • Prep Time: 15
  • Cook Time: 45
  • Total Time: 1 hour
  • Yield: 28 1x
  • Category: cookies
  • Method: baking
  • Cuisine: cuban

Description

These meringue cookies, known as merenguitos, are a traditional Cuban cookie that’s easy to make with just five ingredients! It’s the perfect treat to whip up with the leftover egg whites


Ingredients

Scale

4 egg whites

1 cup sugar

½ teaspoon vanilla

Pinch salt

½ teaspoon cream of tartar

1 teaspoon amaretto (optional)

Parchment paper


Instructions

Preheat oven to 200 degrees

Place the egg whites and a pinch of salt into the mixer and mix on medium for 2 minutes until the egg whites are foamy. Increase speed to high and gradually add the sugar ¼ cup at a time. Beat the egg whites with the sugar for about 6 minutes until stiff peaks form. The egg whites should hold their peaks even when you turn the whites upside down. Add the cream of tartar, amaretto liquor and vanilla and beat for another 30 seconds.

Pipe meringue into little mounds.

Optional: Sprinkle with sugar or shredded coconut.

Bake for 45 minutes. Let it cool in the oven.


Notes

For softer meringue cookies, remove the cookies from the oven to cool.

Keywords: Merenguitos, Merenguito Cubanos, Meringue Cookies, Meringue cookie recipe, Vanilla meringue cookies

noche buena menu

Cuban Noche Buena Food To Make This Year

Enjoy a traditional Cuban feast with these Noche Buena recipes made from scratch. Noche Buena in Spanish means “Good Night.” And it is a good night surrounded by friends, family and fantastic Cuban food!

I’ve put together a Noche Buena menu for you with traditional Cuban dishes, desserts and more. I hope you enjoy making these for Christmas!

Our traditional Cuban Christmas Eve Dinner includes:

Lechon Asado

Roast Pork

Congri

Black Beans & Rice

Yuca with Mojo

Starchy Yuca Vegetable with Garlicky Citrus Sauce

Caramel Flan

Here are all the Cuban food recipes you need to make the best Noche Buena feast this Christmas!

¡Buen Provecho!

Cuban Roast Pork “Lechon Asado”

Cuban Roast Pork

Cuban roast pork is as Cuban as it gets, folks. This traditional Cuban dish is known as lechon asado in Spanish, and it’s the go-to feast for every special occasion, especially Noche Buena. It’s served for Christmas and, in many Cuban homes, for Thanksgiving, too! The pork is marinated overnight or even longer and then cooked until it falls off the bone and the skin is super crispy.

The Best Cuban Congrí Rice (Black Beans And Rice) 

Congri Rice

Congri is my favorite Cuban side dish to make for Noche Buena. This is Mami’s best beans and rice recipe and the one that her kids and grandkids want to learn and pass down. Every Thanksgiving and Christmas Eve, my brother calls from North Carolina asking how to make it. It’s the best! But some folks prefer to have their black beans and rice cooked separately. If you’re one of those, I’ve got a black bean recipe for you as well.

Yuca With Mojo Is A Must For Noche Buena

yuca with mojo

Yuca with mojo is the traditional cuban side dish to serve with Cuban roast pork. In fact, yuca is preferred over the usual fried plantains. As much as we love our fried maduros and tostones, yuca and roast pork are a Cuban power couple. And, of course, you have to make enough for yuca fries the next day! 

Caramel Flan Is The Best Cuban Dessert For Noche Buena

caramel

Caramel flan is, hands-down, the most popular Cuban dessert, and for a good reason. It’s a luscious, creamy, special-occasion-worthy dessert that is super easy to make. This is the dessert that’s on every Cuban table for Noche Buena

Noche Buena Menu

Other Traditional Cuban Dishes To Make For Christmas, Even Before Noche Buena

We also love to make goodies like Cuban shortbread, coconut balls, guava bars and Cuban eggnog with sweeteneded condensed milk and rum. I invite you to try some of these Cuban holiday favorites! But you don’t have to wait until Christmas Eve to enjoy these. Make them a few days early and start your Noche Buena festivities early🎄🎅

Torticas De Moron (Cuban Shortbread) Is Melt-In-Your-Mouth Delicious

torticas de moron

Torticas de Moron are a wonderful Cuban shortbread cookie that’s simple to make and so delicious! The shortening makes this cookie perfectly crumbly and once you bite into it just melts in your mouth. And it’s made even more irresistible with a dollop of guava paste! It’s a great addition to your Noche Buena menu, along with the Cuban flan, of course!

Coconut Balls Are Quick, Easy And So Adorable!

Coconut Balls

These coconut balls are such a Cuban treat. First of all, we LOVE coconut, so of course, we would make these. And if your an Almond Joy or Mounds fan, you’ll love these dipped in chocolate and topped with coconuts or almonds. They make great holiday gifts, too.

Boozy, Sweet Crema De Vie (Cuban Eggnog) Is So Good!

crema de vie

Cubans have their own version of eggnog known as crema de vie, and if you have a sweet tooth, you’ve got to try it! The Spanish translation for Crema de Vie is cream of life, and I can see why it’s called that. It tastes a lot like spiked flan because it has very similar ingredients. I like to have a little eggnog as I’m cooking up my Noche Buena feast, so I make this a few days early. You also need to let it sit for a day, so definitely make it early!

I hope you have a wonderful Christmas Eve celebration surrounding by family, friends and Christmas joy. ¡Feliz Navidad!

Noche Buena Menu
crema de vie

Boozy, Sweet Crema de Vie (Cuban Eggnog) Is So Good!

Cubans have their own version of eggnog known as crema de vie, and if you have a sweet tooth, you’ve got to try it! The Spanish translation for Crema de Vie is cream of life, and I can see why it’s called that. It tastes a lot like spiked flan because it has very similar ingredients.

I like to drink my crema de vie as I’m cooking. It makes it feel more like Christmas. Because when you live in Miami, you need a little help getting in the Christmas mood while it’s 80 degrees outside, so every little bit of Cuban eggnog helps!

crema de vie

Ingredients In My Delicious Crema De Vie

The reason I love this Cuban eggnog is that it tastes a lot like spiked flan. Like my caramel flan, crema de vie is made with eggs, sweetened condensed milk, evaporated milk, and vanilla. In fact, I always drink a bit of the flan when I make it because it tastes so good!

Crema de vie has two more ingredients not found in flan, though. Star anise syrup and rum are added to the mix. Not all recipes use star anise, some use cinnamon instead. But I love the flavor of the star anise in this Cuban eggnog recipe. And, I always sprinkle a little cinnamon on top, so you get all the Christmas flavors going on!

Now be warned, crema de vie is super sweet. I make mine with less sugar than most, but it’s still really sweet. The syrup contains one cup of sugar, and that’s in addition to a whole can of sweetened condensed milk. What can I say, Cubans are sweet ❤️

The rum helps cut down the level of sweetness, so it balances out the flavor. But eggnog is a sweet drink, whether you make the Cuban crema de vie or the traditional version. I use only half a cup of rum in the recipe, but you can add more if you like your eggnog very boozy. I stick to half a cup because that way, those who don’t like it super boozy can enjoy it, and the rest can add a little more.

Cuban eggnog

To Cook Or Not To Cook The Eggs

Crema de vie is made with raw eggs, six egg yolks to be precise. Cubans don’t cook their eggnog. My mom says Cubans have been drinking it this way forever, and no one ever gets sick… that’s Mami’s logic for you!

However, if you’re giving it as a gift or bringing it to a gathering, you may feel better cooking the eggs. So, this recipe has an optional cooking step. Cooking the yolks takes a little patience because you don’t want the eggs to cook too much or too fast, or you’ll end up with lumpy eggnog. Nobody wants that. So, it’s important to temper the eggs first (this means gradually introducing little amounts of warm milk to the yolks). You also need to cook at a low heat and stir constantly.

Give The Crema De Vie A Day To Settle

I gotta be honest, if you taste this Cuban eggnog right after it’s done, it’s not that great. The flavors need a little time to settle and get to know each other. So refrigerate the nog overnight before serving and always keep refrigerated.

Try some Cuban eggnog this Christmas, and let me know how you like it!

Print
clock clock iconcutlery cutlery iconflag flag iconfolder folder iconinstagram instagram iconpinterest pinterest iconfacebook facebook iconprint print iconsquares squares iconheart heart iconheart solid heart solid icon
cuban eggnog

Boozy, Sweet Crema de Vie (Cuban Eggnog) Is So Good!

  • Author: Sandi Abbott
  • Prep Time: 5 minutes
  • Cook Time: 20 minutes
  • Total Time: 25 minutes
  • Yield: 11 1x
  • Category: drink
  • Method: stovetop
  • Cuisine: cuban

Description

Crema de vie (aka Cuban eggnog) is a traditional Cuban drink made with sweetened condensed milk, rum and star anise. So good!


Ingredients

Scale
  • 1 can sweetened condensed milk (14 ounces)
  • 1 can evaporated milk (12 ounces)
  • 6 egg yolks
  • 1/2 cup rum
  • 1 teaspoon vanilla
  • pinch of salt
  • 1 cup sugar
  • 2 cups water
  • 2 star anise (2 full stars)
  • Cinnamon for garnish

Instructions

Make Simple Syrup

  • Mix 2 cups of water, 1 cup sugar and two star anise. Add to a sauce pan and bring to a boil. Cook for 5 minutes or until it thickens slightly. Let cool.

Mix

  • Remove the star anise from the cooled syrup and add to a blender, along  with the evaporated milk, sweetened condensed milk, egg yolks, rum, vanilla and pinch of salt. Blend on low for a few minutes.
  • Strain and pour into a bottle and refrigerate overnight. You need to give the flavors some time to mellow and get to know each other.

If you have an issue with using raw eggs, you can cook the eggs:

  • Heat the evaporated milk over medium heat until it’s warm, but not boiling. Should take about 8-10 minutes .
  • Beat the egg yolks in a bowl, then slowly add a few spoonfuls of the milk to the eggs to temper them. Continue to add the warm milk to the eggs a bit at a time. You don’t want the eggs to cook. Once you’ve added all the milk to the eggs, return to the pot and cook on medium heat for 5 minutes, stirring constantly so the eggs don’t settle and cook at the bottom of the pan. Let it cool and strain before mixing with the other ingredients. Blend as indicated above.

Serve with a sprinkle of cinnamon.  Refrigerate overnight before using, it’s much better that way.


Keywords: crema de vie, crema de vie recipe, cuban crema de vie, crema de vie drink, cuban eggnog

https://beantrain.com/christmas-recipes/
Scroll to Top
Scroll to Top